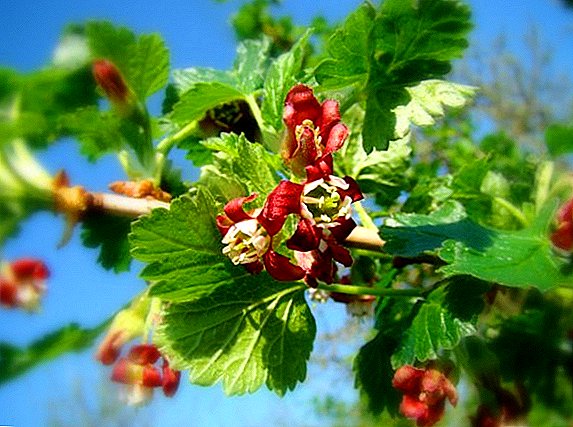
 Derived 30 years ago, the hybrid continues to win the hearts of gardeners. In yoshte there is something of gooseberry, but rather, it looks like currants. Hybrid almost does not succumb to any fungal diseases and pests her nothing. Unlike currants, it can grow even in arid regions.
Yoshta's great advantage is that its berries ripen unevenly, and you are unlikely to find rotten fruit when harvesting.
To cultivate the plant in several ways. Cuttings, layering or seed, for each method has its own recommendations and rules.
Planting such an interesting shrub in your area will not be a difficult task. Secrets of how to propagate yoshtu and how to plant it correctly, we will share in this article.
Did you know? For the best growth of yoshta, plant a bush of gooseberry or currant next to it.
The division of the bush Yoshta
 Yoshta breeding division bush is very popular among gardeners. This method is used exclusively in the fall, when the need arises in the reproduction of the bush. Do not take long to pull out the roots after extracting the roots.
First you need to carefully dig up the shrub without damaging its rhizome. Next, clean the roots of earthen coma, split them with a sharp knife. When dividing it is necessary to leave two or three strong branches on the tuber. Roots must be large, developed, not damaged.
Plots on sections need to be rubbed with crushed coal, after which they are ready for planting. Take care in advance about the new landing site. Holes for seedlings are dug to a depth of half a meter and about 50 cm in diameter. A third of the pit is filled with a mixture humus, superphosphate and wood ash.
Then half the holes are covered with earth and watered abundantly. After the water is absorbed, we plant the yoshtu in the center of the fossa and bury the hole completely. The name Yoshta comes from two German words: yohannisBeere - currant and stachelBeere - gooseberry, Yo-Sta.
Did you know? With proper care, you can collect more than 8 kg of berries from one bush!
Yoshta reproduction by layering
One of the easiest ways to reproduce yoshta is through layering. Propagation can be horizontal, vertical or arcuate layering. The difference between the methods is not big, but they almost all give a 100% germination result.
Horizontal and arcuate layers
 The difference between these two breeding methods of yoshta is small. First, we analyze how to plant yoshtu horizontal lay. In the spring, as soon as the earth becomes warm, the first thing is to dig up the soil near the plant.
It is advisable to remove all weeds and add compost or other organic fertilizer to the ground. Also, the ground should be carefully leveled around the bush.
After making shallow grooves in front of your chosen shoots. Sprouts should be annual or biennial, with well-growing growths. Gently bending the branch, place it in the groove, fasten and sprinkle lightly with earth. An ordinary slingshot will help to keep the branch on the ground without pain.
When the shoots are reached in growth of about 10-15 cm, they are sprinkled with wet earth or humus until the middle of the sprout. It is best to separate the maternal branch and replant new layers in the spring of next year, despite the fact that after a month the first roots already appear.
 When breeding bush arcuate method applied a similar way. Only the branch does not fit completely into the ground, forming an arc. The middle part of the branch is buried to a depth of about 15 cm, leaving only the tip outside. Using this method, it is also worth separating a branch and replanting shoots only after a year.
When grown in horizontal and arcuate layers after separation from the parent branch grow much faster. After planting such shoots, it is possible to get a bountiful harvest in the third year.
Did you know? Sometimes yoshtu is used only for the decoration of the garden.
Vertical layering
If you decide to propagate the shrub vertical otvodkom, then you need to start this in early spring. Briefly trim the maternal shrub, leaving the processes no higher than 15 cm. With careful care and watering you will receive abundant growth and many young shoots as soon as possible. Regular watering and application of organic supplements will help you with this.
 The first time spud shoots need to be when they grow to about 15 cm. The bush should be spud in the center with wet earth or compost. To prevent the branches from coming together, the earthen embankment should be dense. After three weeks, repeat the procedure. Hilling is best done after rain.
When you spud the yoshta a second time, water the ground abundantly. Layers are cut for planting only next year in early spring or autumn.
Yoshta reproduction cuttings
Another method of breeding yoshta - cuttings. There are two types of vegetation cuttings: woody and green. Methods of harvesting shoots are different from each other. How to propagate yoshtu cuttings, described below.
Woody cuttings
For reproduction of yoshta with lignified cuttings, it is recommended to choose mature shoots of two to three year old branches. It is best to engage in harvesting at the end of September, because the cuttings planted during this period have time to root well and will easily endure the winter period. On the day of cutting, the yoshta shoots should be divided into cuttings up to 20 cm long, leaving 5-6 buds on each. The upper part of the shoot do oblique kidney.
 Planting cuttings should be carried out on the day of harvesting. The soil for yoshta should be deeply dug up, cleared of weeds, and most importantly, well leveled. Planted cuttings at a distance of 15 cm from each other. The distance between the beds should be at least 60 cm.
Cuttings are planted at an angle of 45 degrees. And on the surface should remain two buds, and one - at ground level. The soil around the seedlings tightly pressed to avoid the formation of voids. After that, the beds should be plentifully watered and sprinkled with peat.
Important! If for some reason you postpone planting, then the cuttings can be stored in the cellar, buried in wet sand. But in the spring it is better not to delay the landing. As soon as the weather resolves, plant cuttings on the beds!
Green cuttings
Reproduction by green cuttings is considered one of the fastest ways to get yoshta seedlings. For harvesting choose tall, healthy bushes. With overgrown mother plants, cuttings can be cut several times over the summer. For the first time in early June from the upper branches, the second - after regrowth and better from the side branches, the third time - in early September.
 The length of the cut cuttings should be no more than 15 cm. After you have cut the cuttings, you need to free them from the leaves, leaving a couple on top. Before planting in prepared greenhouses, cuttings can be sustained in any growth stimulator.
Preparing a greenhouse is not so difficult. Pour fresh ground into a wooden container and a layer of clean, coarse sand above. After planting in greenhouses cover with foil. The main care for them is regular watering. After rooting the cuttings, the film can be removed and soon transplanted to grow.
Important! It is not recommended to use for cuttings the uppermost part of the shoot.
Planting yoshta seeds
If you do not want to engage in the preparation of cuttings, you can plant yoshtu from seeds. Seeds are sown in autumn, in the year in which they were collected. If you started planting in the spring, the seeds are needed three-month stratification. They are kept in a damp place - in the wet sand.
 The soil for seedlings should be well fertilized, dug up and cleaned of weeds. For yoshty make shallow beds, which after sowing watered. Most often shoots appear in autumn, less often in spring. It is possible to replant on a constant place of residence saplings in two years.


