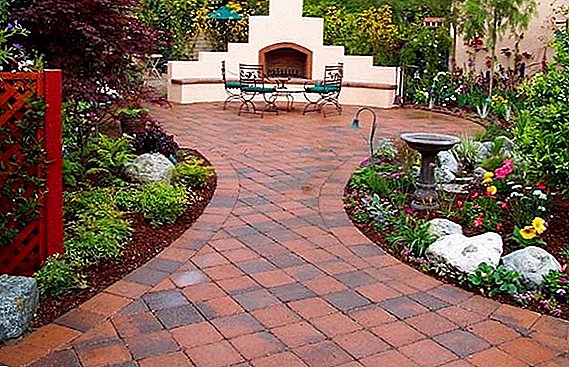
Equipping the tracks on the summer cottage or near a country house, everyone wants them to be not only functional, but also fit into the overall design of the landscape. Finding the right tile doesn't always work. In such cases, many decide to create paving slabs with their own hands at home. How to do this, we will tell in this material.
Making tiles at home, is it worth
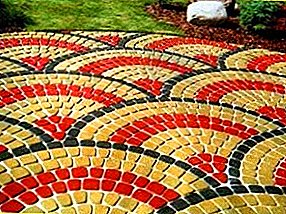 First, let's see how profitable it is to make tiles yourself. The process of its creation requires a lot of time, labor and care. An indisputable advantage - as a result you get an exclusive path, made in accordance with the design of your house and the surrounding landscape. Experimenting with the coloring of the tiles, you can fold the incredible patterns.
There is also the economic side of the issue: paving slabs for tracks in the country, made by hand, is much cheaper than finished products. In addition, you can make the coating in accordance with the features of its operation. To cover the playgrounds, footpaths, entrances to the garage put forward completely different requirements for strength and other characteristics.
The process of making paving slabs
So, if you are inspired by the idea of creating a cover yourself, let's analyze this question in detail.
Making an individual form
To make a tile to the cottage with your own hands, you will need a form in which products will be cast. Suitable forms can be found in any specialty store. You will be offered a wide selection of plastic products in shape and size. But we must remember that most of them are designed for only 200 fillings. Therefore, having decided on the form, it is necessary to purchase about a dozen such containers.
Did you know? Making your own tile molds can be turned into a creative process using a wide variety of containers. For example, food containers are suitable for this business. They are quite soft, flexible and at the same time durable.
Selection of materials and preparation of the solution
 To prepare a solution for future tiles, you need to buy cement and sand, you will need more water. The quality of the mixture depends on the exposure of the proportions and the quality of the cement used. For garden paths it is recommended to use cement grade M 500. All components must be clean, free of dirt and leaves. If in the sand there are large stones - it does not matter. This will give the tile a special texture.
Did you know? It is possible to increase the strength and resistance of the tile to temperature extrusions by adding special plasticizers to the mortar.Having filled up components in the necessary proportion in capacity, they need to be mixed. To do this, you can use a perforator with a mixer nozzle. But if you plan to produce large volumes, it is better to purchase a concrete mixer in advance.
In the latter case, sand is first poured into the installation, the agitator is turned on, and cement is gradually added to it. After that, without ceasing to stir the mixture, add water and plasticizers in small portions as needed.
Important! Too much water will make the concrete less durable and the tile can crumble quickly during operation. So that the solution does not absorb excess, add reinforcing fiber and water-repellent additives to it.
 In order for the tile to obtain the desired color, various inorganic pigments are added to the solution. It is important that they are resistant to alkaline conditions, atmospheric phenomena and ultraviolet rays. Then your tile will retain its color for a long time. It is recommended to first add to the solution about 30-50 g of dye and gradually increase its amount, if necessary. As a rule, within 5-7 minutes the solution acquires a uniform color. And the absence of lumps in it indicates the readiness of the solution for use.
How to pour the solution into the form, process features
Now the solution can be poured into forms. Before this form must be lubricated with any oil, but it is better emulsolom. Then, after drying, you can easily remove the product.
Important! At this stage, you can increase the strength of the product. To do this, pour the solution into the mold by half, and then put a wire, a metal rod or a net into it. After that, top up the solution to the brim.But this question, how to make paving slabs with your own hands, does not end there. There may be bubbles in the solution, which make the cement mass too loose. To eliminate this trouble, it is necessary to lay out the forms on the vibration table. During the constant light movement of the concrete will leave the excess air. Such a table can replace any shelf or rack. Forms are laid out on it, and then the construction is tapped from all sides with a mallet.
How to dry tile and when to use it
The next stage is the drying of finished products. Flooded forms should be covered with plastic wrap and wait about 3 days. Ensure that the desired level of moisture is maintained in the future tile. To do this, they can be periodically moistened with water.
After drying, the forms gently tapped, bend the edges and take out the product. But they still can not be used - it is necessary to withstand another 3-4 weeks, so that the tile is sufficiently dried and strengthened.
Manufacturing technology of rubber tiles
 In addition to concrete, rubber crumb is used to make tiles. It is made from recycled tires. The tires themselves, as a rule, are made of high-quality material, since they can withstand heavy loads for a long time.
The crumb made from them can have various fractions that vary from 0.1 mm to 10 mm. Which one to use depends on where the rubber tile will lie and how it will be subjected to stress.
It is usually made in black color, but sometimes it can be painted in other colors. Moreover, usually coarse fractions are painted (2-10 mm), which are much cheaper at cost, since they may include metal and textile parts.
Important! In the manufacture of colored tiles, it is necessary to form it in two layers, one of which is colored. This is permissible if the total thickness of the product is more than 1.5 cm. The black tile may be thinner, but made in a single layer.The manufacture of rubber tiles itself takes place in three stages.

- At a preparatory stage the rubber crumb prepares. For this, the tires are removed from the side rings and are subjected to their mechanical cryogenic processing. Then it turns out baby with a fraction of 1-4 mm.
- Then from the crumb it is necessary to prepare the mixture by adding a polyurethane binder. At the same stage, various pigments are added to the color of the tile.
- The mixture is compressed on a vulcanizing press. It allows you to set the tile the desired thickness and density. The pressing process can be cold or hot. It all depends on what equipment you purchase for work.
Concrete Pouring
Another way to create a beautiful track in the country is to fill it with concrete. This process goes through the following stages:
- marking the area under the track;
- soil preparation;
- installation of formwork;
- pillow formation;
- installation of reinforcing elements;
- pouring concrete.
Required material and tools
To get started, you must select the necessary materials and tools in advance:
- crushed stone;
- sand (preferably river);
- concrete;
- cord and pegs for marking;
- capacity for solution;
- ruberoid;
- bucket;
- pointed shovel;
- Master OK;
- reinforcement (optimally 12 mm thick);
- plywood or formwork boards.
How to mix concrete solution
 First of all, it is necessary to knead the solution. It consists of 3 components (cement, sand and crushed stone), which are mixed in a certain proportion: a bucket of rubble and 3 buckets of sand are taken to the cement bucket. Knead them better in the concrete mixer.
Did you know? Sometimes it is recommended to take two buckets of rubble and cement, but in this case it is necessary to level the solution using a vibrating rail. If it is not, it is better to stop at the above proportion.The kneading begins with the addition of water to the mixer. Then sand is added to it and cement is injected, constantly stirring. When the sand is evenly distributed throughout the mass, the solution is considered ready. Now you can start the fill.
Pouring concrete into formwork
 This stage also has several stages. The fastest and easiest way is to mark the tracks. It is necessary to determine in advance where they will pass, how wide to have and what loads to experience. Then the pegs are driven into the ground through a uniform distance, and the rope is tensioned between them.
Now you need to prepare the ground for casting. To do this, the top layer of sod is removed to a depth of about 7 cm, the roots of plants are removed. If they are not removed, they will rot in this place, voids will form in which water will accumulate. In winter, it will freeze, displacing concrete. Because of this, the tracks may crack.
The next stage is the installation of formwork of boards or plywood. The latter allows you to give the track beautiful bends.
Important! It is necessary to fill the path with parts so that there are seams on it to compensate for the contractions and expansion of the concrete due to different ambient temperatures. Therefore, the formwork can be put in parts. In addition, it will reduce the consumption of materials.
Then a so-called cushion is installed, which will perform the functions of drainage, as well as evenly distribute the load on the track. A pillow of sand and rubble is formed. They do not hold water, so it will not linger there and expand in winter due to freezing. But sand eventually falls below rubble. To prevent this, waterproofing materials are laid out directly on the ground: roofing felt, agrofibre or geotextile.
The last two let in water, but do not rot. When the pillow is laid, it must be tamped. Moreover, dry sand, it is desirable to pre-wet. In this way, it will be compacted better, which will prevent the appearance of voids. But make sure that the layer lies flat.
Did you know? Sometimes flat stones or a thin concrete screed are used to form the cushion. But in this case it is necessary to deepen the track in advance by their thickness.
 Almost everything is ready for pouring, but first you need to lay down the reinforcement or reinforcing mesh. For this, the prepared track is covered with plastic wrap to prevent premature drying of the concrete. It has to harden, and the cement jelly participates in this chemical process, which quickly goes out of the mixture into the sand.
Now you can fill the track. If this is a pedestrian zone, then the pad with the concrete should be a layer of a thickness of 5 cm or more. With more aggressive use of the track, the layer should have a thickness of 7.5 cm. The cement is poured in portions, each of which is leveled and compacted until the cement jelly appears. When the mixture is slightly dried, you can trim it with a spatula and, if necessary, install decorative elements. Then the cement should be closed with a film for the same purpose - so that it hardens, and does not dry, it must be periodically watered.
If you plan to pour cement in several layers, the intervals between the fillings should not be more than a day. Otherwise, the top layer will not grab the bottom layer. After about 3 days, the formwork can be removed, and the track can be used in another couple of days.
 As you can see, to cover the tracks in the country or at a country house tiles own production is quite simple. This will help you save on the upgrading of the territory.