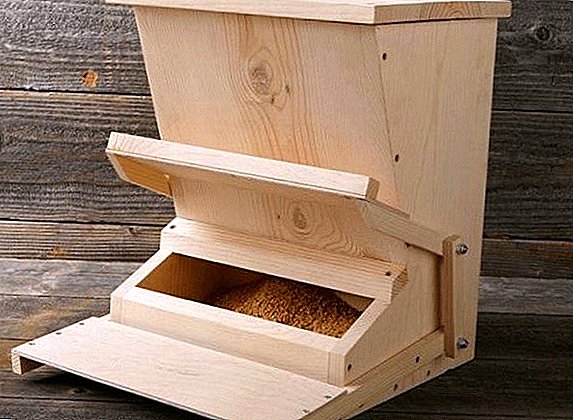
 Not all poultry farmers have the opportunity to constantly take care of poultry, and if, for example, you breed chickens in the country, arriving once every few days, then it is advisable to automate the processes of feeding water and food as much as possible. A good solution to such problems will be automatic drinking bowl or feeder, collected by yourself, and for the implementation of this venture, you can use improvised items. How to make the feeder correctly and what options for its creation exist - on this later.
Bunker (vacuum)
This variety of chicken feeders is most common, which is not surprising, given the simplicity of its creation.
Principle of operation
Bunker feeder - closed vertical tank with a tray connected to it, where the feed is poured in small portions. So that the chicken does not crawl inside and does not scatter the food, the transition from the main part to the tray is intended to be narrow, and the grain is filled as needed. 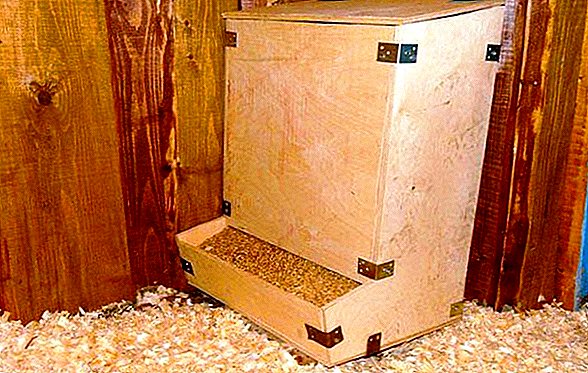 Below we consider several options for making such a canteen for birds, but in any of them it is important to properly fix the feeder so that it does not turn over and it can be regularly removed for cleaning.
Did you know? Along with other human phobias, increasingly today, there is anelectrophobia, in other words, the fear of chickens. It turns out that some people are not only afraid of chickens and chickens, but also of everything associated with them: eggs, body parts, feathers, or even litter.
How to make
All the necessary tools and materials for the case will be found in every home, especially since the most popular varieties can be created from ordinary plastic buckets, pipes or bottles. Let's look at each of these options.
Find out more useful about making drinking bowls and feeders for chickens.
From plastic bucket
This is a good option for installing a feeder on the street. With proper design, the feed will be reliably protected from moisture and will retain its properties well. 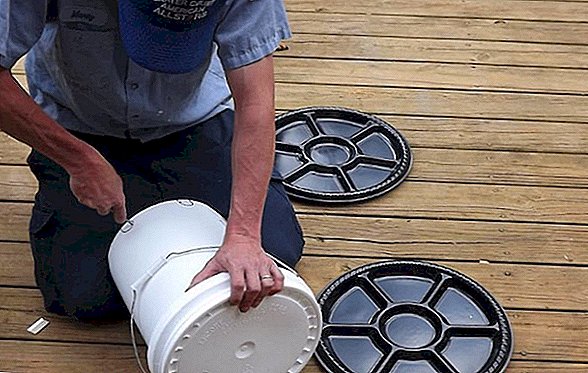
In addition to the plastic bucket itself (enough capacity for 5-10 liters, but always with a tight lid), you will also need:
- plastic tray divided into cells (sold in many farm stores), the usual shallow basin, tray or some other flat stand with small sides. The main thing is that its diameter of 20-30 cm was greater than the diameter of the bottom of the selected bucket;
- plastic cutter;
- screws and nuts.
The manufacturing process of the feeder includes the following steps:
- Take the prepared clean bucket and make several semicircular holes at the bottom, placing them at the same distance from each other (it is desirable that the diameter of one hole corresponds to a value of 4-5 cm, but this depends on the feed fraction). When using a tray with dividers, the holes in the bucket should coincide with the placement of grooves on them.
- Take the screws or screws and screw the pan to the bucket in the center.
- Pour the food into the feeder and close the bucket with a lid.
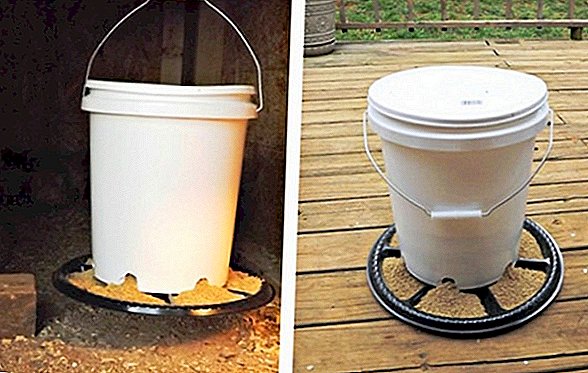
Important! The sides of the used pelvis or tray should be soft and rounded so that the bird does not hurt. As an option, you can glue them with tape.
If there is no suitable bucket in your farm, you can replace it with a plastic bottle from under the water of a similar volume. Mark a cell for food will help a strong wire, it can also be used for additional fixation of the structure.
From plastic bottles
Plastic bottles of larger volume (often installed in offices for the supply of drinking water) will also be an excellent reservoir for food.
In this case, for the construction of the feeder you will need:
- one or two bottles;
- plastic cutter or regular stationery knife;
- a basin whose diameter should slightly exceed that of the bottom of the main tank (if you have only one bottle).
The manufacturing process in this case will look like this:
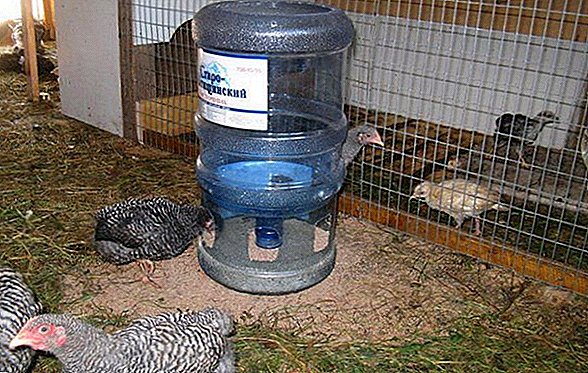
- We take the first bottle and cut it in the center into two parts (only the bottom half with the bottom will be needed later).
- In the lower part from all sides we cut out the “arched” holes of such a size so that the chicken's head can freely enter them. If the edges of the holes turned out very sharp and can hurt the bird, it is advisable to glue them over with tape.
- We take the second bottle and cut the bottom from it.
- We turn it over to the bottom with holes (neck down) and fall asleep through the top of the feed. The filled container can be closed with a lid or basin, the main thing is that such a cap should fit as closely as possible to the edges of the bottle and, if necessary, be easily removed.
Important! The neck of the upper bottle needs to be fixed a little below the bottom edge of the holes, otherwise the feed will spill out of the feeder.
If the bottle is only one, then the role of the second will be performed by a deep pelvis, in which it will be necessary to make the same “arched” holes as in the first case, retreating a few centimeters from the bottom line. 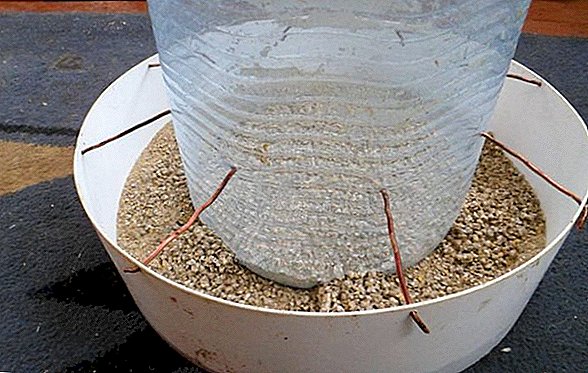
By the same principle, it is possible to make containers for feeding chickens using standard 1.5-liter bottles, which will be even more preferable than using large containers (young growth often does not allow it to reach food in adult feeders).
For the manufacture of "children's" automatic feeder you will need:
- two bottles with a volume of 1.5-3 liters (the upper part with one neck should freely enter the middle part of the second);
- feed tray (a lid, plastic bowls or any other plastic container with small rims will be suitable for the role of the chickens so that they can easily get the food);
- clerical knife or special plastic cutter.
The process of creating a "baby feeder" consists of the following steps:
- We take a smaller bottle and cut off its upper constricted part (the bottom can be thrown away).
- Now we take a big one and remove not only the upper cone, but also the bottom, so that the middle with the “neck” remains.
- In the lower part of the midpoint obtained we cut small two-centimeter holes.
- We connect this part with a box for food.
- The cone remaining after the separation of the smaller bottle is twisted with a lid and placed inside the structure so that the feed does not get stuck on the bottom.
The finished chick feeder will look like this: 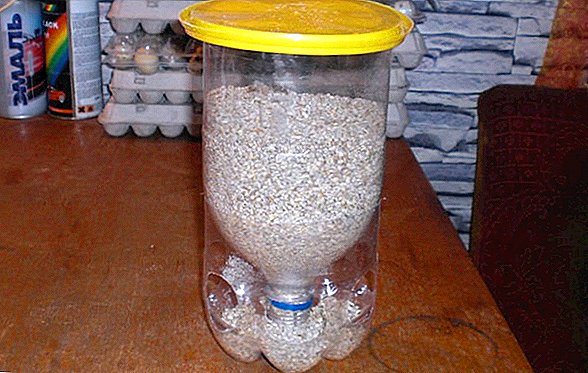
Pipe feeder
Ordinary plastic water pipes of various diameters can be considered as good material for the manufacture of automatic feeders. Moreover, it is possible to pick up special connecting elements (for example, a knee) to them, which will only facilitate the process of creation.
For the proper maintenance of chickens, it will be useful for you to learn how to choose a chicken coop, how to build a chicken coop with your own hands, how to build a chicken coop for the winter, how to make a roost for laying hens, how to make a cage for laying hens, how to make a nest for chickens.
Principle of operation
The principle of operation of such a feeder is extremely simple: the poultry farmer pours feed into the pipe through the upper opening, after which the grain enters the knee. As soon as the chickens eat a certain amount of food, another portion will appear from the pipe.
Did you know? Getting into the beak of the chickens, the food moves into the stomach only under the action of gravity, muscular action has nothing to do with it. Therefore, the chicken can only swallow upright.
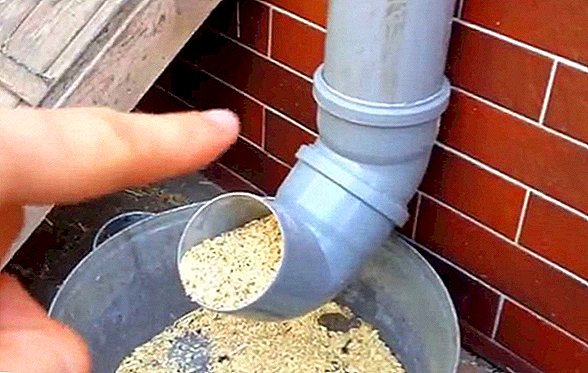
How to make
In the simplest version, you can take a plastic pipe of large diameter and just hang it in the house, deepening the lower part in a bucket or a wide bowl. As soon as the bowl runs out of food, it will appear from the pipe again.
To feed a large number of birds, you can connect two pipes to each other (to make the letter “G”) and in one of them make several holes with a sufficient diameter for the passage of the chicken's head.
Having fixed the structure in a small house, all its inhabitants will be able to eat at the same time, and as necessary, the grain will be filled from a single, vertically arranged pipe. 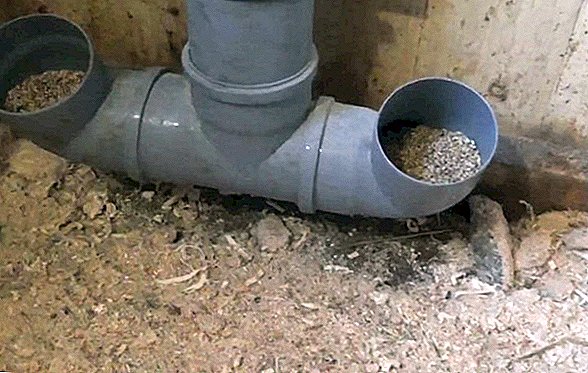
PVC pipe with tee
Another simple method of making feeders using pipes involves the following tasks:
- Find a plastic pipe of large diameter, tee and plugs to it.
- Plug one hole in the pipe (this will be the bottom of the structure).
- Stepping back from the edge with a plug about 10-15 cm, cut the pipe into two parts.
- Now take the tee and put it on both ends so that the "nose" is looking up.
- Pour the grain through the top hole and close it.
The feed will come to the lower part as it is devastated, and the chickens do not scatter the grain, because they simply cannot reach it. This is a good solution with a large number of chickens, however, in such a case, such a pipe will not be enough. 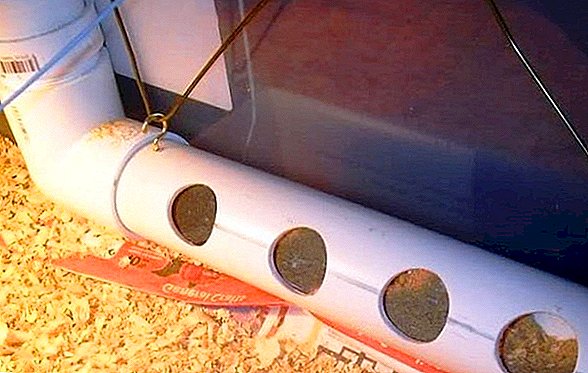
From pipes with knees
- With a small farm, you can build a simple feeder, created from separate pipes with elbows at one end. For this you will need: several long tubes (about 7-10 cm in diameter),
- knees, tight to them,
- connecting element to fix all the pipes together.
Alternatively, you can attach each of them to the wall in close proximity to each other. Having poured food into the upper opening, it is better to close it tightly with a plug: this will protect the nutritional mixture from moisture that has accidentally entered.
To understand all the simplicity of making such an automatic feeder version, just look at the photo of the finished product. 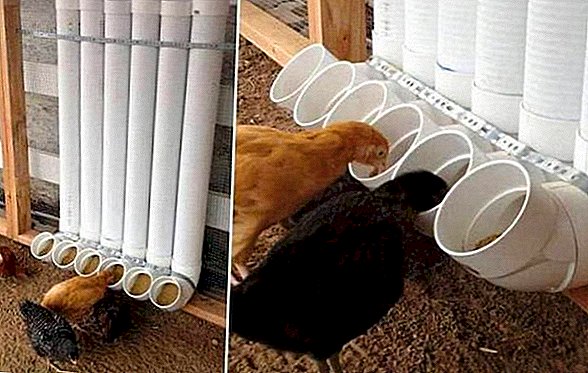
Wooden feeder
Wooden feeders-machine - the most complex products of all the proposed options. It is possible to get a high-quality and functional feed supply system, having only accurately calculated all the dimensions of the individual parts of the wooden structure. The task is complicated by the need to work with wood and saw.
Principle of operation
Plastic products from bottles or pipes sometimes have a negative effect on the appearance of the chicken coop, and although this factor does not play a very important role in the breeding of poultry, some poultry farmers want to eliminate it.
This can be done with the help of a conventional wooden feeder (the grain gets into the lower tray as soon as there is a place in it) or go in a more complicated way and make a wooden feeder with a pedal: the cell with the feed will open only after the chicken steps onto the appropriate platform. pedal. 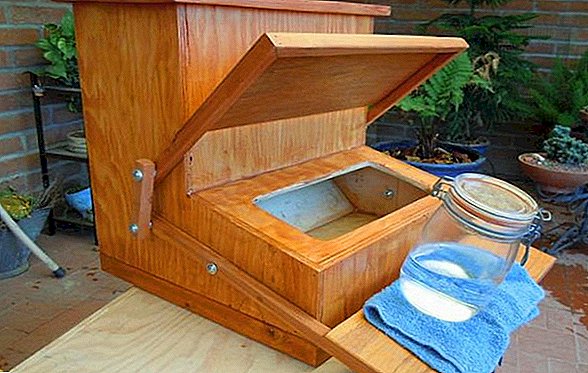
With proper processing of wood, wooden feeders can be installed in the yard without fear of rain.
Important! You should not use standard paints to cover the tree, because even after complete drying, harmful particles can still get into the food of birds, sometimes causing quite a serious poisoning.
How to make
In each of these cases, you will need boards or thick plywood, screws and a screwdriver, but the complexity of the task will be different. Consider each of the options for creating a wooden auto feeder.
Auto-feed option without pedal
In addition to the above tools, it is worth preparing: drill, drills, hinges, sandpaper, saw, pencil, large sheets of paper, tape measure and any antiseptic to cover the finished product (it is undesirable to use varnish and paint).
The process of creating a simple wooden trough looks like this:
- We draw separate parts on sheets of paper that will later become a good piece. In the role of side elements are two parts with a height of 40 cm, a top edge of 26 cm and a bottom of 29 cm (with triangles cut from one side). For the "face" we will prepare two rectangular shapes, measuring 28x29 cm and 7x29 cm. A rectangle of 26x29 cm will be the detail for the lid, and the same figure of 29x17 cm is well suited for the bottom. We produce the back wall according to 41x29 cm.
- Cutting all these parts out of paper and re-checking everything once more, you can transfer the drawings to the boards and cut the necessary parts out of them.
- In the finished parts with an electric drill we drill holes for the screws and process all sandpaper to make them as safe as possible for the birds.
- We assemble the construction according to the scheme below, not forgetting that some walls (back and top front) should be at an angle of 45 degrees with respect to the horizontal.
- Put a cover on the hinges, screwing it to the backs of the side walls.
- The finished feeder is treated with an antiseptic.
The drawings and the finished product should look like this: 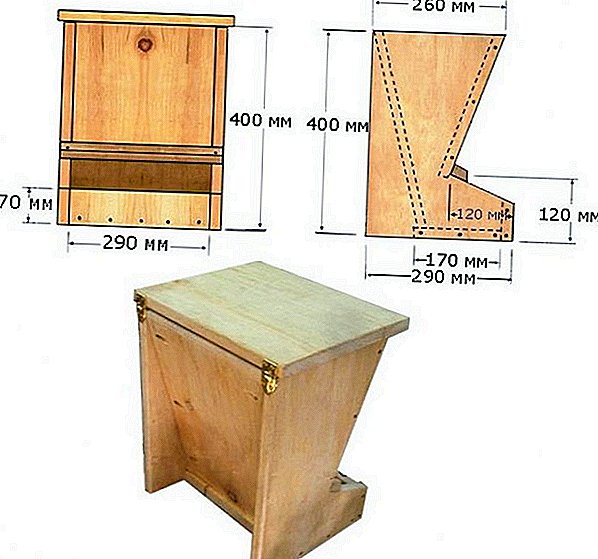
Option car feeder with a pedal
Feeding trough with a pedal - a much more complex structure in comparison with the previous version. Despite the fact that the principle of its work is simple, it will be necessary to tinker with the manufacture of individual parts, especially since there are a few more of them here compared to the previous version.
To get started, you need to prepare wooden boards or plywood sheets, several thin wooden bars, bolts for collecting furniture, hinges, an electric drill, drills, sandpaper, a saw, a pencil, parchment paper for patterns and a tape measure or a long ruler.
Important! Instead of parchment paper to create drawings, you can use regular wallpaper, especially since they are much stronger than tracing paper.
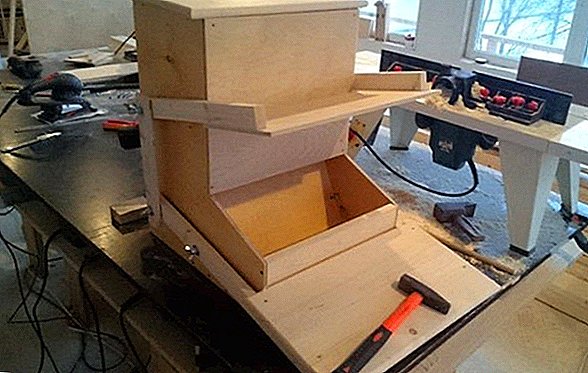
The process of creating a "pedal" trough looks like this:
- First, on parchment paper, draw all the details of the future design: the lid for the tray, two side panels, the bottom, the back, which, as in the first case, should be placed at an angle, two rectangular parts for the front of the structure, the top cover for the feed compartment and the pedal itself (when determining the best dimensions of the product, you can consider the above figures and drawings).
- Cut the bars into six parts: two of them to be used for mounting the pedal should be longer than the previous ones (specific calculations are made taking into account the width of the pedal and the box). Two middle bars are needed to hold the cover above the box with feed, and the third pair of bars (the shortest) is used to strengthen and connect the parts of the lifting mechanism.
- Using a saw and patterns, cut out the necessary parts from plywood, process them well with emery paper.
- Having drilled holes in the right places (mainly at the corners), assemble all parts of the structure together using screws (the back should be at a 15-degree angle).
- Screw the top cover, connecting it to the back wall with hinges attached to the top of both parts.
- Now you can move on to the most difficult task - collecting pedals and bars. In this case, will help focus on the above photo. First you need to connect the middle bars with the sides of the box with food, and on the opposite side, drill two holes, and closer to the end of the bar (similar side holes should be made in the side walls of the box). You can immediately screw the bolts themselves, but only so that the bar can move in the plane of the wall.
- Similarly, attach long bars to the trough pedal, making a hole to connect to the structure wall for about 1/5 of the entire length. Another hole must be drilled at the very end, on the opposite side of the pedal.
- After connecting the stage with the feeder case, you will have two free holes on each side. They need to be used for vertical mounting the smallest bars. This connection must be made as rigid and durable as possible, because otherwise the pedal will not be able to function properly and chickens will not have access to food.
- Be sure to make sure that the food cover works as it should and rises with little effort (you can put an object on the pedal similar to the approximate weight of the chicken). Adjust the screw tension if necessary.
- Treat the box with an antiseptic.
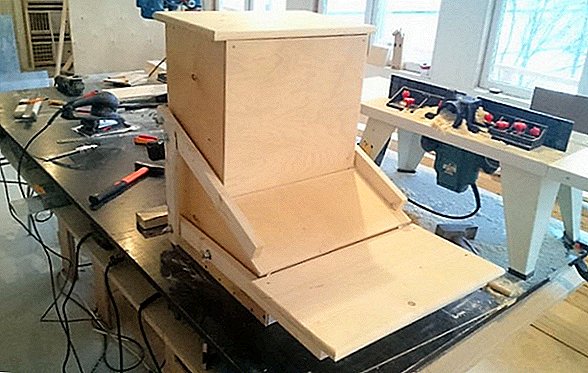
It turned out ready, very functional automatic feeder, which can be placed inside the house or under a canopy in the yard.
As you can see, there are many interesting and relatively simple options for self-construction of automatic feeders for chickens. All of them will be an excellent solution if you do not want to spend money on the purchase of a finished structure and have all the necessary materials at home (at least many have bottles and bottles).
Study, choose and decide with which trough you will simplify your life while caring for birds.


