Sometimes this situation may arise: you decide to increase the number of poultry, but the question arises about the place for its maintenance. Or they decided to have 5-6 ducks and hook them up in a chicken coop, but on the other hand, 2 dozen chickens can be accommodated on the area necessary for 5 ducks to live. Instead of puzzling over a difficult choice, it is worth doing the construction of a duck shed.
Choosing a place
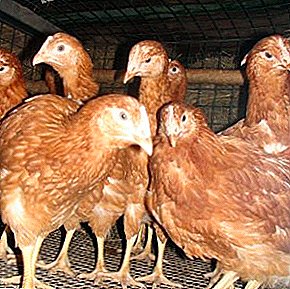
First you need to decide whether you really need a separate room for breeding ducks. In the event that you plan to limit the livestock of 4-6 individuals, they will get along quite well with chickens. If your duck herd will consist of 10-12 and more individuals, then it is really worth building a chicken pie.
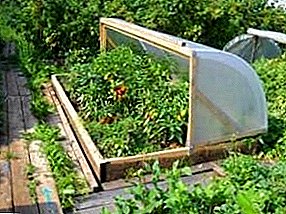
 Build a duckling is not recommended near the reservoir, except that a temporary structure
You need to start by finding the right place. Look carefully at your hacienda and try to find a place that meets these requirements:
- Look for a free construction site on the south side of the plot. The windows of the future duck house should also open to the south.
- Avoid low places, but a small elevation is a great solution.
- Although ducks adore water, this does not mean that they like to live in dampness. The construction site must be located on a site with normal humidity.
- If there is a pond or a river near the site, pay attention to places located not far from them. At the same time, do not forget the previous paragraph. In the immediate vicinity of the reservoir build utyatnik not recommended.
Important! Due to constant cold exposure and dampness, the duck feather loses its qualities, as a result the bird begins to ache. So despite the fact that the duck is a waterfowl, it must live in warmth and dryness.
Construction Utyatnik
Before embarking on construction, you need to make a project and make a drawing of the duck house. It follows from these considerations: on 1 square. m square can normally accommodate 3 adult ducks.
These birds, unlike chickens, like spacious rooms, they cannot sit on the roost most of the time. In addition, you may want to increase your duck population over time. Therefore, if you have, say, 15 ducks, you do not need to build a room of exactly 5 square meters. m - make a barn with a reserve area, 12-16 square meters. m
Performance indicators depend not only on the conditions of detention and care, but also on the breed, learn about the characteristics of the most common breeds of ducks.
We will present the draft of a duckling with a total area of about 20 square meters. m, with a waiting room and place of walking. Accordingly, a list of materials required for the construction of such a room will be given.
 Example of a plan of a duckling
However, it should be borne in mind that this project can be easily changed and the area of the shed to do less. In this case, and the material will need less. For example, you can do without a pad for walking or a waiting room. Although it is worth noting that the same waiting room can not be called a primary necessity, but it will help to solve such pressing economic problems as storing tools, feed, placing heating (stoves), etc.
Find out what you need for breeding ducks blue favorite, Star-53, Bashkir, Musk, Peking ducks.
It may also happen that there is simply not enough space for a building of this size in the place chosen by you. Well, in this case, experiment, take this project as a basis and, having made changes, adapt it to your conditions.
 Example of a plan of a duckling
Did you know? In China, they grow about 2 million ducks per year. This figure is about 75% of the entire global industry.
Tools and materials
We decided to opt for wood - the most environmentally friendly, although not the cheapest material. But thanks to the lightness of the construction, it will be possible to save money on the foundation, because for such a mattress there is no need to fill in a capital foundation, a light pile would be enough.
The choice of quality material is crucial. Depends on how long your construction will stay.
For the construction of Utyatnik need:
- Timber (section 15 × 15 cm) with a length of 3.0 m - 2 pcs .;
- A timber (15 × 15 cm) 2.4 m long - 5 pcs .;
- Timber (10 × 10 cm) 3 m long - 2 pcs .;
- A timber (10 × 10 cm) with a length of 2.8 m - 5 pcs .;
- A timber (10 × 10 cm) with a length of 1.7 m - 5 pcs .;
- OSB;
- bars 5 × 10 cm;
- ruberoid;
- mineral wool;
- foam assembly;
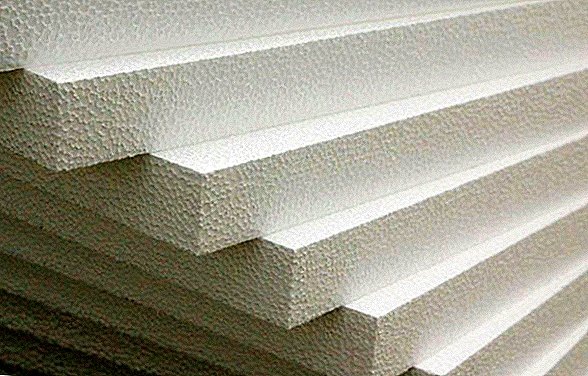
- polystyrene foam;
- boards for formwork;
- paint;
- fittings 10-12 mm;
- asbestos cement pipes;
- corners and tires metal.
 Pay special attention to the quality of wood - the presence of rot, wormholes, will reduce the life of the Utyatnik
We will make the bottom trim and logs from a timber section of 15 × 15 cm, a 10 × 10 cm timber will fit vertical posts and a roof frame. The floor covering, roof and walls will be made of OSB-plate. The dimensions of the OSB required for construction must be calculated by adding the area of the walls, the roof and the floor.
Find out if you can keep chickens and ducks in the same room, how to keep ducks and chickens together.
Complex geometric shapes of the drawing should be divided into simple squares and triangles, then folded areas of simple shapes and get the total area of complex. But when purchasing it is better to take the material with the stock.
 When choosing OSB-plates, give preference to OSB3 plates, they are more resistant to high humidity, they are recommended to be painted to increase stability.
Tools required for construction:
- shovels (screw, bayonet, podgrebnaya);
- roulette;
- rope and pegs;
- level of great length;
- the square is construction;
- marker or pencil;
- chisel;
- screwdriver;
- electric drill;
Learn how to build a house on the summer cottage with your own hands.
- electric jigsaw;
- Bulgarian with a nozzle on a tree;
- hacksaw;
- concrete mixer (preferably, but not necessarily);
- capacities for concrete and a bucket for water;
- electric planer;
- hammer;
- crosshead screwdriver;
- plummet;
- stapler;
- consumables (screws, nuts, etc.).

Important! Wood for the construction of the shed, especially its supporting bars, should have a moisture content not exceeding 22%.
Building
When all materials and tools are ready, you can proceed directly to the construction. The whole process of building a shed consists of the following steps:
- foundation casting;
- manufacture of lower strapping;
- the construction of vertical racks and top trim;
- installation of the roof structure;
- assembly of all elements and lining OSB-plate;
- installation of heat insulation;
- painting, summarizing communications, interior arrangement.
If you are thinking about whether to get a duck, find out how useful duck meat, duck eggs, duck fat.
Foundation
We decided to make a pile foundation - it is light, simple to manufacture, has significant advantages: an air cushion between the ground and the floor of the shed is a natural thermal insulation, the room will be less attacked by rodents, birds will hide in the space under the floor on hot days.
- With the help of stakes and rope you need to mark the place.

- Along the perimeter of the marking, remove the top layer of soil to a depth of 25 cm.
- Using a screw shovel, make 10 vertical recesses (depth - 1-1.2 m, diameter - 0.3-0.35 m) with intermediate distances of 0.75 m.

- Fill the bottom of each well with a layer of wet sand in such a way that the height of the compacted layer is 15 cm.
- Now you need to make a formwork for the pillars. The easiest and cheapest option is to make a formwork of roofing material, turning it into a sleeve and inserting it in recesses. But it is better to use asbestos pipes of suitable size for this purpose.
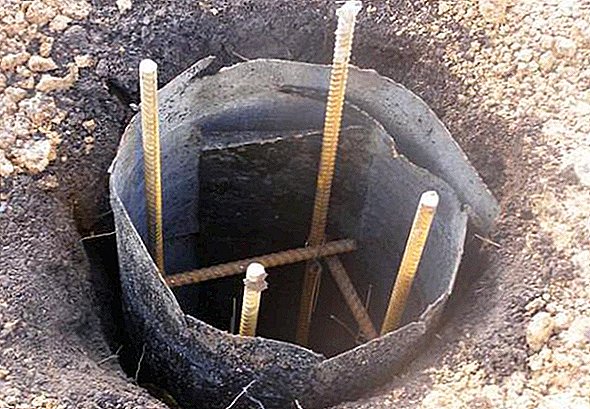
- To make the piles stronger and better held, in each well place a structure of 4 reinforcing rods interconnected by means of small (20-22 cm) reinforcing rods and steel wire. The distance between adjacent bridges is 40 cm, the type of jumper at the top should resemble a tic-tac-toe field, where the vertical bars of the reinforcement (10–12 mm thick) pass through the intersection points of the thin rods (at 90 °). The formwork should rise above the ground by 0.2 m. The reinforcement structure will be 0.25-0.3 m higher than the formwork.

- When the formwork and the fixtures inside are installed, fill the space between the formwork and the walls of the well with sand, periodically tamping it down. If ruberoid is used as a formwork, it is not necessary to ram the sand heavily so that it does not squeeze a ruberoid sleeve due to excessive pressure.
- It's time to pour concrete, usually used for this purpose brand M200. Piles will harden for 10-14 days, depending on weather conditions. If it is hot outside, then for 3 days, starting from the 2nd, pour water over the constructions in the morning and in the afternoon. In the hottest part of the day, piles need to be covered with rags or cardboard so that concrete does not crack due to the scorching rays of the sun.

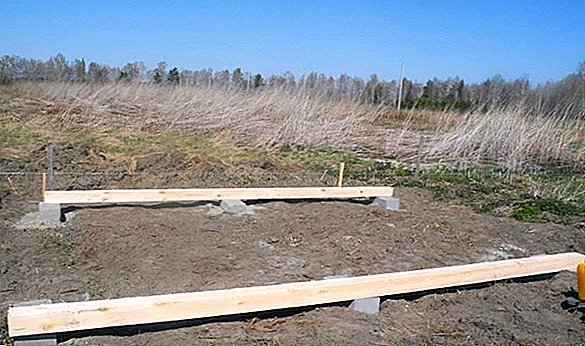
- When the piles are completely dry, you need to start making the lower trim. It is made of bars with a section of 15 × 15 cm. Make two longitudinal extreme sides of the trim from 3-meter bars, and cross-sections (they are ribs of rigidity) - from bars of the same section and 2.4 m long. The distance between adjacent lags is 45 cm (the junction of lags and longitudinal bars must correspond to the piles). Connect the bars together by the method of "half-timbered".


Did you know? In South and Central America duck almost is not eaten, considering it to be specific to taste.
Floor
The floor can be made concrete, it is easy to manufacture, it is easy to clean. True, for such a light construction there is no need for it, and such a screed has a significant drawback: concrete is a cold material, so you have to warm it well for the winter. Although in the wooden floor will need to close up all the cracks with mastic or foam.
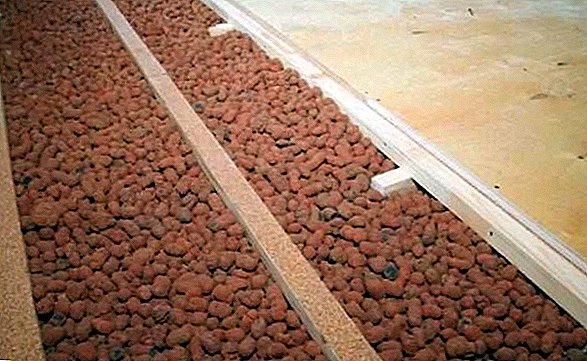
We decided to make a wooden floor, with insulation from expanded clay. We will tell about floor insulation at once, although it is necessary to make this element after the walls are insulated:
- Lags are mounted on the OSB-plate (board 4 × 15 cm). Install the boards with the end surface on the plate, that is, the height of the screed will be 15 cm (width of the board). The gaps between the lags are 0.6 m. You should have rectangular cells of approximately 0.6 × 03 m. Attach all boards to the slab with screws and corners.
- In the resulting cells, pour claydite into place, level well with the level of lags.

- Cells, covered with expanded clay, cover the building with polyethylene film, securing it with staples using a stapler.
- Put the OSB-plate on the logs, fasten it with screws.


Learn how to build a chicken coop, a goat barn, a sheepfold, a barn.
Wall
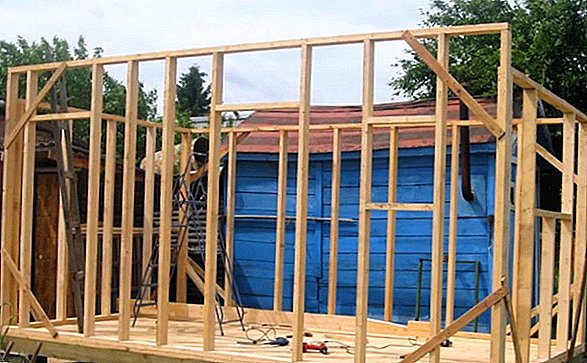
The next stage, after making the lower trim, is the installation of the frame:
- The first step is to install vertical posts (10 × 10 cm bars) at the corners of the strapping. Pre-drill from the ends of the bars drill holes for reinforcement sticking out of the formwork (the reinforcement must be pre-painted or treated with an anti-corrosion coating).

- All vertical posts secure with metal corners. For strength, the structure is reinforced with struts (bar 10 × 10 cm with ends cut at an angle of 45 °). Attach the struts to the uprights and strapping on bolts of appropriate length and on nuts and washers.
- Install window frames, doors, horizontal elements and top trim (5 × 10 cm timber). The top trim is made at a height of 2 m from the bottom. Fasten all the elements with end-to-end screws using corners.


Important! The struts should be mounted only with bolts and nuts, be sure to use washers. Screws in this case are not suitable, because, loosening or tightening the nuts, you can align the vertical posts, changing their angle of inclination.
Roof
It's time to make rafters. Collect this element of design better on the ground. The base of the frame is 5 × 10 cm, 2 of which (longitudinal) are 3.4 m long, and 5 pieces (transverse) - 2.8 m each. When assembling, use angles and tires.

When the frame is ready, you can proceed to the wall and roof cladding OSB. The plate is mounted outside the frame on the screws. Try to combine the pieces of the slab so that the seams were as small as possible, and the joints are more accurate and have no gaps.
Those gaps that still remain, blow the foam. Use the same foam to fill the joints (if necessary) between the frame elements.

After installing the skin should be waterproofing. At the moment, the easiest and most effective way is bitumen mastic. Apply it with a roller on the outside of the walls, roof and floor.
After mounting the roof, cover it with roofing material outside; put polycarbonate or slate on the roofing material. Use nails with rubber pads and galvanized washers to secure.

Did you know? As you know, ducks love to feast on fish and can successfully catch it. But not everyone knows that while birds are able to dive into the water to a depth of 4.5-5.5 m
Warming
There are many types of insulation. They differ in their characteristics and price. Let us consider in more detail some types:
- Styrofoam - the most popular insulation due to the relatively low price, good thermal insulation qualities and ease of installation. According to its insulating qualities, it is 10 times larger than concrete. It weighs very little, is used for all surfaces (walls, floors, ceilings). Among the shortcomings can be distinguished fragility and flammability, the combustion products of the foam are poisonous. It is used most often for technical premises.
- Penoplex - durable insulation that is easy to work with. It is moisture resistant, does not burn.

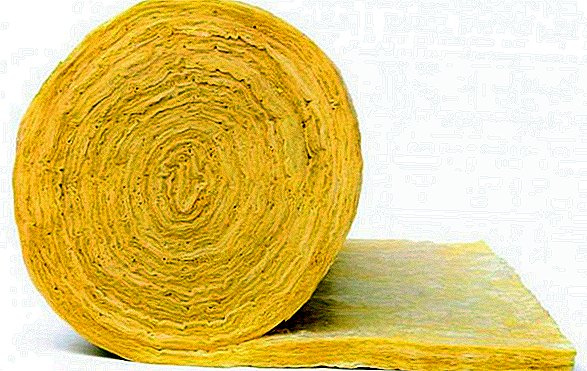
- Basalt wool - non-polluting material, does not burn, does not pass sounds, is applied both to external, and to internal works. In conditions of high humidity, additional vapor barrier is required.
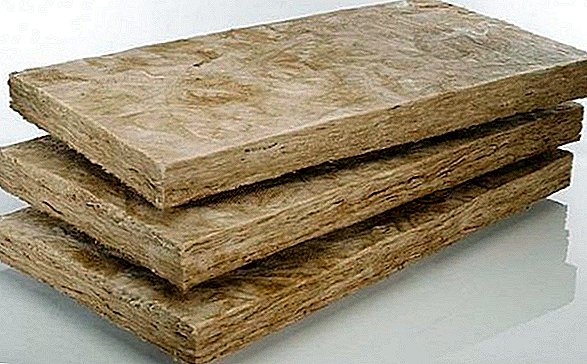
- Mineral wool - currently popular type of insulation, fire-resistant and environmentally friendly. The steam passes through the material, the moisture does not. Some types of mineral wool, with proper installation, can last up to half a century. What is important, this mouse material loves much less than other types of insulation. Among the shortcomings - it requires protection from moisture, deformation has a strong impact on the insulating quality. Not used in basements due to increased sensitivity to moisture.
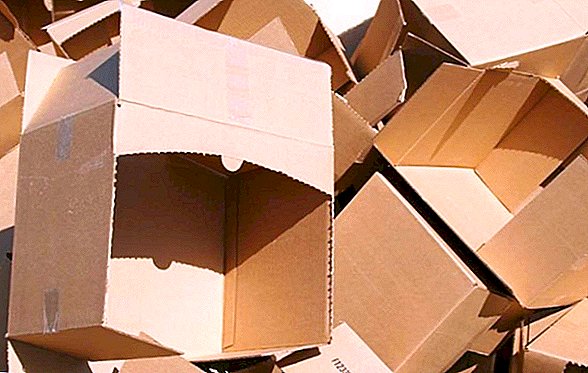
- Cardboard - of the advantages it is possible to single out only that this material can be found for free, and it can protect from the wind in dry weather. But this "insulation" has a lot of flaws: it gets wet quickly, does not hold heat, and promotes the reproduction of fungi and microorganisms.
- Expanded clay - Excellent environmentally friendly insulation. Resistant to frost, fire, has a small mass and enough cheap. Among the shortcomings - it absorbs moisture very strongly, which is why deformation of the heat-insulating layer is possible, as well as fragile enough, and for high-quality thermal insulation a thick layer of material is needed.


Important! At all stages of the assembly of vertical and horizontal elements, you should constantly check the angles, verticals and horizontals with the help of level, plumb lines and carpenter's square.
Walking
For normal existence, the ducks need enough space and access to water in the summer. If on your site there is a place sown with grass - well, the question of summer walking is solved. These birds, like other poultry, love to walk on the grass in search of bird delicacies. But unlike chickens, they do not dig the ground.
In the event that there is no normal place for walking, you need to build it next to the utyatnik. To do this, it will be enough to install 4 racks on which a canopy of slate or polycarbonate will be supported, with a slight slope for the drainage of rainwater. Place two pillars near the corners of the long house wall, the other two - at a distance of 2 m.

The result will be a rectangular platform, the two sides of which are equal to the length of the house, and the other two will be 2 m long. In the middle of one of the small sides of the future yard for walking, the one on the side of the entrance to the house (waiting room), install another rack . Shelters for the entrance door will be placed on it, and the second pillar of the door frame will serve as a corner pillar.
The space between the racks taken net-rabitsa. The door is made of a corner, welded in a frame, with a diagonal stiffener, covered with a grid.
Did you know? Certain species of ducks can travel up to 500 km by air during the day.
It will only be good to strengthen the net below, having stuck it into the ground by 25-30 cm, to make a bed of sand, sawdust and hay, to build a small swimming pool for swimming, for example, to make it from a trimmed tire for a truck (tractor).
Such walking, an area of about 8 square meters. м, будет полезен и для зимних прогулок, ведь даже если вы имеете возможность выпускать уток во двор, то зимой в этом нет смысла ввиду отсутствия травы.

Внутреннее обустройство
Перед тем как перейти к обустройству интерьера утятника, следует принять во внимание такие факторы:
- Ducks are very fond of light, they need it for normal life and egg production. The window should be large enough.
- Overcooling is contraindicated for ducks, so it is worth thinking about winter heating if the air temperature in winter is a long time below +12 ° C. For these purposes, use infrared lamps, stoves, stoves or water circuit, taken from home.
Familiarize yourself with the rules of equipment room for growing indoutok.
- Winter litter should be thick enough, dry and soft. A mixture of sawdust, ash and hay (straw) is suitable as a material. In the summer, sand is an excellent solution.
- Sand or ash (you can mix these two substances) are needed for birds and for bathing. Take care of the appropriate place.

Lighting
For natural lighting Utyatnik serves window. It is desirable that it be large and facing south. But this is not enough: an additional source of lighting must be equipped in the room. It should proceed from the following calculations: 7 square meters. m - 75 W, 10 square meters. m - 100 watts. This is a conventional incandescent lamp, besides it should be placed at a height of 180-200 cm.
Important! The room for keeping ducks should be lit about 15 hours a day.
Ventilation
Drafts feathered categorically contraindicated, freeze ducks is also extremely undesirable. Therefore, the ventilation holes need to be located at a level above duck heads. The colder air from the street will still fall down, displacing the warm air, so that the room will be properly ventilated. A duck ventilation is necessary, otherwise the development of infectious and fungal diseases.

Nest
Duck nest is made of wood, boards or plywood. Its dimensions are:
- length - 45 cm;
- width - 40 cm;
- height - 35 cm.
Find out when to cut the indoutok for meat.
The front side should remain open, with a small (10-12 cm tall) side below - this will be the entrance to the duck's nest. One nest is designed for 2-3 birds. Cells are interconnected by side walls, forming a single structure that is installed on the floor.

Drinkers and feeders
The easiest version of duck feeders is to make shallow trays of this size using wood or plywood (you can use the remnants of the OSB-plate):
- length - 70 cm;
- width - 20 cm;
- depth - 7 cm.
If you are far from a natural reservoir, it will not hurt to learn how to make a pond for geese and ducks with your own hands.
Here are the approximate dimensions for the simplest design. It can be supplemented with one longitudinal handle, located at the top, or side, for ease of transfer. The choice of material thickness is at your discretion.
For drinkers, you can use the available tools. It is desirable that they are sufficiently wide, stable and not have high sides. 
Did you know? A large number of ducks have always lived in the pond of the Dublin Central Park. 100 years ago, during the intensification of the struggle for independence, the British fought the Irish even within the city park. At the same time, hostilities were suspended daily in order that the park ranger could feed the birds.
We talked about the approximate design of the shed for ducks. You can do it by strictly following the points of the plan, or you can only be guided by our recommendations. It is possible that you have already begun to build a duck house, in this case, we hope that our advice will help you make it comfortable, warm and cozy.
Video: where to keep ducks in the winter, if there is no utyatnik
Where to keep ducks in winter: reviews

Floors in the house should be made durable, inaccessible for the penetration of rodents, with a level of 20-25 cm above the ground.
Not far from the foundation, you need to design a drain hole for winter. the period was not damp inside, but inside it was divided into two zones - a rest zone (dry) and a feeding and bathing zone. The screed in the area of feeding and bathing should be done with slopes in the direction of the drain (which goes into the drain hole). At the end, install grilles (wooden or metal) in the food and bathing area and it will always be dry and clean inside ...