Proper timely transplantation of anthurium, cultivated at home, is one of the main measures of care, allowing to improve the immunity of the plant. How to perform the procedure, when it is required, and whether it is possible to repot the anthurium in the fall - read below.
Why do I need a transplant
There are 2 types of anthurium transplantation:
- planned - is carried out as plants grow up and are braided with the roots of the whole earthen coma, or after purchase;
- unscheduled - is carried out in case of decay of the root system, infection of diseases.
Did you know? If you cut off the flower of anthurium in the staminate stage, that is, when the cob is covered with pollen and the cover is completely open, it will be able to keep its freshness in a vase for 5 weeks.
Planned transplantation is carried out by the transshipment method with full preservation of the earthen coma.
Its frequency depends on the age of the plants:
- young specimens dive every year;
- adult specimens dive 1 time in 2-3 years.
Unscheduled transplantation can be carried out in the fall and even in winter, with complete replacement of the soil mixture and washing the root system. The main objective of this procedure is the preservation of the plant organism.
How to transplant in another pot
So that the plant’s root system is less exposed to the danger of mechanical damage, it is necessary to shed soil abundantly with water in the evening before the pick. 
When is it better to transplant anthurium
It is best to transfer the anthurium to a new pot in the spring. But recently purchased a copy can be replanted at any time of the year, a week after purchase. However, if it is in bloom, then it is better to wait until the end of this phase and only then transfer to a new container.
Pot selection
Plastic containers are best suited for anthurium. The size of the container is selected depending on the size of the root system, plus another 3 cm. The pots with the same parameters of height and diameter are selected according to the shape. The main requirement for the packaging is the presence of large, 1 cm in diameter, drainage holes.
The pot should be clearly selected in size. In large containers, anthuriums begin to actively build up the root system and green mass, therefore they may not enter the flowering phase for several years. However, this is not the worst outcome - in too large pots the risk of infection with rot increases during overflow.
Important! For Anthurium do not fit clay pots - they are cooled too quickly in winter, as a result of which the roots get frostbite. In addition, clay containers are produced with one drainage hole, which provokes the rotting of the roots.
Soil selection and preparation
Soil for transplanting a flower can be purchased at the store or mixed independently.
Of the finished substrates for anthurium are best suited such:
- "Polessky";
- "Auriki Gardens";
- FORPRO.
Soil base for these colors:
- pine bark;
- peat.

You can then use the priming mixture in this form or enrich it with additional elements:
- charcoal - 10% of the total mass;
- sphagnum moss - 5%;
- pine needles - 1%;
- coarse sand - 2%;
- vermiculite - 1%.
From this list, you must select only 1 additional component or use all of them in the proposed volume.
For disinfection of soil (and compiled independently, and purchased) use a hot solution of furatsilin: for 100 ml of boiling water you need to add 1 tablet of the drug. At 5 kg of soil mixture will need 1 liter of solution. After adding the disinfectant composition, the soil must be thoroughly mixed and wait for it to cool.
Read also how to grow anthurium, the rules of growing and caring for a flower.
Drainage
Drainage is necessary to control moisture in the pot. It helps to improve aeration of the substrate, and also reduces the risk of rotting of the roots.
As a drainage can be used:
- expanded clay;
- broken brick;
- Styrofoam;
- rubble
Tools for work
To transplant an anthurium, you need the following set of tools:
- new pot;
- disposable gloves - to protect the skin of hands from the poisonous plant sap;
- sharpened scissors, treated with alcohol, - to remove excess roots.
Video: Anthurium Transplant
Transplant procedure
Step-by-step Instructions for Anthurium Transplantation:
- Prepare the ground in advance.
- Treat pots with furatsilinom.
- Place a drainage layer in the pots.
- On top of the drainage lay a layer of new soil, 1 cm high.
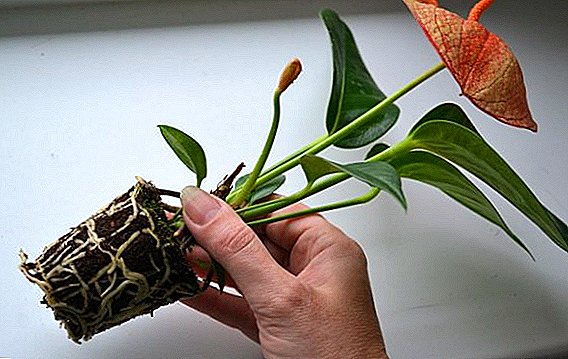
- Holding the old pot in the half-prone position, stick its walls and, holding the stem, pull out the plant.
- Assess the condition of the roots - cut off sluggish, dried and damaged ends. Process the cuts with wood ash.
- Place the plant together with the earthy lump in the center of the tank, align it in height so that the stem is 2 cm deeper than the previous container.
- Fill the gaps with primer.
- Cover the ground surface with sphagnum moss.
Important! After picking, anthurium can slow down its development and not enter the flowering phase for a long time. You should not worry - during this period there is an active build-up of the root lobe.
Care after transplant
After transplanting the plant, it is necessary to return it to its original place and create a shading to them against direct sunlight. Anthuriums need a lot of light, but after transplantation, they become too sensitive as they pass through a period of adaptation. Shading can be removed on the 5-7th day after the picking. During this time, the plants do not water.
After canceling the shading, spraying with Appin should be carried out according to the instructions.
Further care standard:
- accommodation - Eastern and south-eastern window sills with the presence of protection from direct sunlight;
- daylight hours - 12 hours;
- temperature - + 22 ... + 26 ° С;
- watering - after drying the top layer of soil to a depth of 3 cm, pour water into the pan, and after 20 minutes remove its residues;
- air humidity - 80%, you can use a humidifier;
- spraying - In the heat of every day, in winter, a complete cancellation;
- top dressing - 2 months after transplantation complex fertilizer for aroid fertilizers according to the instructions.

Answers to user questions
Below you can find answers to the most frequently asked questions of new growers. Perhaps among them you will be able to find a solution to your problem.
Why the flower does not take root?
Anthurium can react to transplanting yellowing and drying leaves with the following errors:
- the drainage layer was not laid on the bottom of the pot;
- wrong soil is chosen - it contains more peat than bark.
In addition to improper transplantation, the cause of drying leaves may be low humidity. In such cases, the leaves dry and turn yellow only at the tips. A humidifier and regulation of irrigation regime will help to correct the situation.
Did you know? Anthurium flower is considered a honeymoon symbol in Colombia. A newly minted couple decorates their dwelling with bouquets of these plants and does not remove them during the first month of living together.
Do I need to replace immediately after purchase?
After purchasing a new flower, be sure to transplant it. The fact is that plants intended for sale are placed in a cheap soil mixture consisting mostly of peat and coconut fiber. Plants quickly deplete the soil and remain without power, so watering is carried out with the addition of long-acting fertilizers (6-8 weeks). At the time of sale, food stocks are most often running out. If you do not transplant plants, they may die.
First, plants need to give acclimatization to a new place. Then - remove flower stalks, if any, and carry out transshipment according to the above instructions.
Can I repot during flowering?
During flowering, an immediate transplant is allowed in the following cases:
- infection by disease;
- root rot.

How to divide the plant?
Anthurium transplantation by the method of separation of the bush is carried out only when the plant reaches the age of 4 years. After removing the anthurium from the pot, it should be divided by hand or with a knife into equal parts so that on each remains approximately the same number of leaves, roots and buds. Containers should be selected according to the size of the root system, taking into account that there should be a distance of 3 cm from them to the wall of the pot.
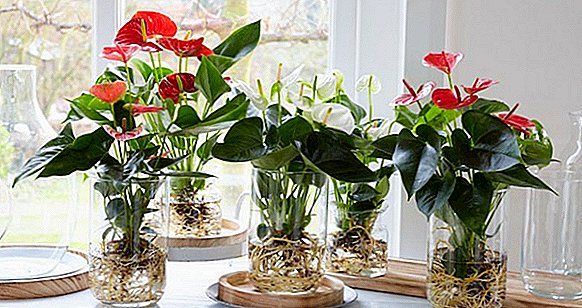
Anthurium is a bright representative of epiphytes and half-epiphytes, able to decorate any room with them. An important nuance of caring for this plant is a transplant, which must be carried out in compliance with all rules.