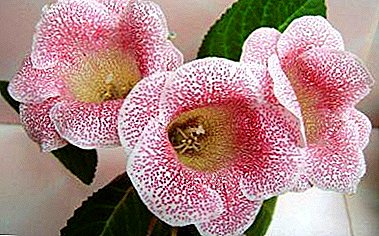
Gloxinia - a stunning flower with an unusual appearance. Its blooming is fascinating and impressive, and anyone who has ever seen Gloxinia wants to have this amazing plant.
The reproduction of gloxinia leaf is the easiest way. Many gardeners choose this breeding method.
Leaf propagation can occur in two ways: using a leaf as a cutting, using a part of a leaf. This is what the article will be about.
Breeding methods
How can I plant a flower? Gloxinia, like many plants, is propagated by seeds and vegetatively. The vegetative breeding method includes: reproduction by leaf, stem cuttings, peduncles and division of the tuber. You can find out how to plant a hybrid hybrid or gloxinia with seeds, tubers, and also about caring for a potted flower after transplanting here.
Is it possible to grow a leaf?
Growing gloxinia from a leaflet is possible, but there may be some difficulties. They are associated with rotting cuttings, withering leaves or not wanting them to take root.
Features of growing
 Growing from a leaflet can also be divided into methods:
- Rooting leaf in the water.
- Rooting leaf in the ground.
When rooting on the base of a leaf plate and even Tiny daughter outlets may form on large veins near Gloxinia. with their own nodules. After that, they begin to actively grow and develop, turning into a beautiful, full-fledged flower, which will continue to delight you with abundant flowering.
After acceleration, a very important component of reproduction is the landing of the cutting, which must be done correctly, without making mistakes. It is after planting and the active growth of the plant begins. Next, we consider how to plant, what pot to choose and how to care for the handle.
Preparation: soil and material
You can take care of the appearance of roots.. Just pour a small amount of boiled water into the container. In this glass is placed a piece of paper.
It is not necessary to deeply deepen the cutting into the liquid. This can provoke the development of rot. It is enough that the water covers no more than a centimeter of the length of the cutting or fragment of the leaf.
You can and carry out planting immediately into the ground.
If the leaf is very large, it can be divided into parts. You can divide the sheet into 2 or three parts.. The soil must be moistened.
Landing
How to plant a plant? Plastic cups can be used for planting. From the gloxinia, it is necessary to cut a piece of paper with a stationery knife or blade. It should be noted that the cutting should remain 1.5-2 cm. After all, the shorter the leaf, the faster its roots will appear. Do not take too old sheet, or very young.
If gloxinia is small, “baby” first leaves remain in the lower tiers - they are also not suitable for getting young rosettes. In the glass must be poured drainage. Foam can be used as drainage. Polyfoam is very light, easily accessible, and also serves as a heat-insulating pillow if the plant is standing on a cold window-sill.
A plastic cup should be filled with about half of the earth. The amount of land depends on the size of the sheets. It is necessary to do so that after the earth is poured into a glass, you can put a sheet, and it does not stick over the glass.
 This is very convenient when covering it with a package. Before planting a plant, it is advisable to let the leaf slice dry for about 10-15 minutes, this prevents rotting, since the leaf wound heals during this time.
Leaves are planted directly into the ground, deepening by about 1 cm.to make it easier for the roots to breathe. It is necessary to water the land after landing. You need to pour quite a bit of water about 2-3 tablespoons.
Next is to put them in sealed bags. Water from them does not evaporate. Watering is not necessary. Airing is also not necessary.
Pay attention to the condensate formed over time is not worth it, it does not harm the leaves.
After 2-3 weeks, roots appear. It is necessary to expose to a brightly lit place, the light must be diffused. The temperature should be 20-25 degrees.
You can add sphagnum moss, it has a bactericidal property.
If approximately 2 months after rooting the leaves do not germinate, they can be broken off and left in the light, watered as they dry. After 1-1.5 months sprouts will appear. After the babies that have appeared reach a height of 1.5-2 cm, it is necessary to remove the bags so that the shoots will get used to the home conditions.
We offer to watch a video on how to root Gloxinia correctly with leaf fragments:
We offer to watch a video on how to root gloxinia leaves correctly:
Choosing a pot
Choosing dishes for gloxinia does not play an important role. It is preferable to choose not deep, but wide pot. The width of the pot should be at least 8-10 cm. The capacity of the pot is about 1 liter. At the bottom of the pot it is necessary to make drainage holes.
Soil selection
Earth should be taken light, air. You can use neutralized peat. Stimulants of rooting, growth are added to it. A prerequisite is that the acidity does not exceed 6.5.
How to seed?
After the sprouts become so large that they will be uncomfortable to fit in a glass, they are required to be transplanted into pots for permanent residence. From the plastic dishes pour the ground, get a sprout. He can already observe the nodules. It is advisable not to shake the earthen room. Put the sprout in the pot and gently cover with earth, a little shedding.
Home care
 Gloxinia - light-loving plant. It is necessary to put it in a bright place, even during the rooting period. It is important that direct sunlight can harm it.
Watering requires a plant as the land dries (how to properly water and feed the plant can be found here). Water should be filtered, rain, melt, or boiled. If you water the Gloxinia with water drawn from a tap, you must defend it for at least 24 hours. Be sure to make sure that the water does not fall on the leaves of the plant when watering. Watering is required gently on the edge of the pot.
In order not to be mistaken with watering, you can use the pan. Pour the water into the pan, wait until gloxinia gets drunk, about 20-30 minutes. After this, it is necessary to drain the remaining water. It will be better if the water temperature is a few degrees above room temperature.
About the features of proper care for gloxinia at home, we talked here.
When does it bloom?
After seating, after about 1.5 months there will be sockets with flowers. Gloxinia is easy to propagate, even beginning flower growers deal with this procedure. That is why gloxinia can be so often found on the windowsills of many houses. If everything is done correctly, you can get strong, and most importantly, healthy gloxinia sprouts, which will be pleasing to the eye for a long time (see why the gloxinia does not bloom and how to make it release the buds, read here).