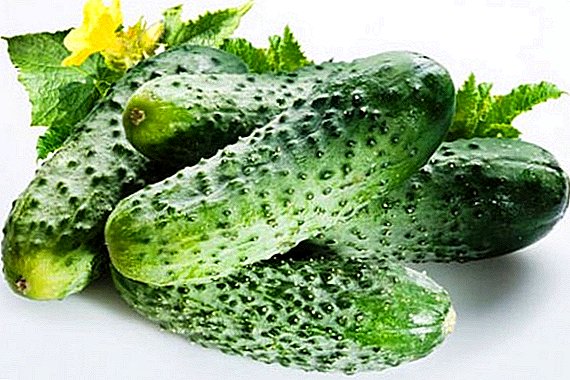
Garlic is a useful crop, cultivated by many home gardeners. But few know all the features of this process. Understanding these details allows you to increase the yield of winter garlic and improve its quality.
Consider in the article, when and how to plant garlic in the fall in the country or in the garden, to what depth should be planted and other subtleties of planting, so that it is large and tasty. And also we will give some useful tips that will definitely help to achieve the desired harvest.
Why does this question arise
So, why the question arises, why plant garlic in the autumn period before winter? Although most gardeners use winter varieties of garlic, very few people can clearly explain its benefits. The main reasons why planting a winter variety of garlic is more convenient as follows:
- Less hassle in the spring. At the time when most crops are planted to waste time on garlic is irrational.
- Shorter growing season. If we compare the time from the appearance of the first shoots to harvesting, then it is not very different. But winter garlic has an advantage in planting - while spring will only be planted in the ground and does not even begin to grow, winter will already throw out the first leaves. Due to this, he gives the harvest for 3 - 5 weeks earlier than the spring.
Winter garlic can be planted at the dacha and reduce spring troubles, while receiving a greater yield.
What is the difference from spring planting?
Despite the fact that winter and spring garlic is practically one culture, there are differences in planting. Winter garlic is planted deeper than spring, planting in several tiers is allowed. At the same time, the planting scheme of winter varieties may be more often spring, this has practically no effect on the crop.
Less soil requirements - if the delay in spring due to low temperature can become critical and affect the garlic yield, then an early or late planting does not have such an effect (when planting garlic in the spring?). The clove in any case will take root and quickly rise in the spring, minimizing the miscalculation.
How to plant winter garlic in the spring is written here, and from this article you will learn how to plant spring garlic in the spring.
Features depending on the climatic zone
 Depending on the climatic zone and local local conditions, the method and pattern of planting differs.. There are no unambiguous recommendations, depending on the current year, local temperature features, depth, and landing pattern may differ slightly.
In the zone of temperate continental climate - the Moscow region and the middle belt of Russia, the landing pattern should be 20 to 25 or less. The depth must be greater than 5 cm so that during the frost after the thaw there is no freezing of the seed. Planting garlic to a depth of 7-9 cm and additional mulching for the winter period are optimal.
In the southern part of Russia it is possible to plant at a lower depth and more often.. It is allowed to land according to the pattern 20 20 or 20 by 15 staggered. With regular mulching, it can be planted to a depth of 3-5 cm, without mulching, it is advisable to plant to a depth of 10-15 cm. So the plants will have enough moisture to form a head.
Selection of winter varieties
Before going to the market in search of planting material, you must learn to distinguish between spring and winter varieties. It is not uncommon for unscrupulous vendors to give out spring garlic for winter and vice versa.
The following signs are characteristic of winter garlic:
- Pronounced central stem.
- The shape of the cloves and their arrangement resemble orange slices. Winter garlic has only one row of cloves.
- The shell of the teeth is tough and rather dry.
Winter garlic is different in all respects:
- No pronounced stem, it may not be in the center.
- Multiple teeth. Their form is chaotic, they can be arranged in several rows.
- Soft shell cloves. In structure, it is more like onion peel than a hard shell.
If you look at the garlic beds, winter varieties are easily identified by the arrow. Spring garlic does not throw it away, breeding only cloves.
The table shows the varieties suitable for almost all regions of Russia.
| Grade name | Maturation, days | Number of teeth, pcs. | Taste | Head weight, g |
| Near Moscow | 95-100 | 5-7 | acute | 50-65 |
| Sixtieth | 87-98 | 7-11 | acute | 40-60 |
| Anniversary | 83-122 | 6-11 | semi-sharp | 40-60 |
| Winter Komsomolets | 110-125 | 6-13 | semi-sharp | 40-60 |
| Zubrenok | 87-98 | 4-6 | semi-sharp | 50-70 |
| Lyubasha | 110-120 | 7-9 | very sharp | 110-120 |
| Reliable | 87-98 | 6-7 | acute | 60-70 |
| Novosibirsk | 75-85 | 4-10 | semi-sharp | 25-35 |
It is important to pay attention to the ripening period and relate it to local conditions. If all varieties are suitable for the southern regions, then the north of the region, the shorter the growing season and the early ripening garlic should be.
Timing: when to fall?
Planting dates are directly dependent on the climatic zone of growing winter garlic. The farther north the climate zone, the earlier it is necessary to plant garlic:
- For central Russia, this is the end of August - the middle of September.
- For southern Russia, this is the middle of September - the beginning of October.
In general, it is possible to determine the landing time as follows - 20-25 days before stable low temperatures.
Step-by-step instruction: how to plant a winter variety in open ground?
Before embarking on a direct landing, it is necessary to prepare all the tools and materials:
 Inventory. If you plant garlic in rows at a shallow depth, then you will need a hoe and rake. If you plant rows in great depth (7 - 9 cm), then it is worth preparing a manual plow. When planting to a depth of more than 10 cm, it is more convenient to use a peg and a hammer. For convenience, the peg can draw a mark on which it will stick into the ground.
- The soil. Choosing a place for a bed is important - garlic is a demanding crop. To get a good harvest, acidity must be neutral or low. The bed is oriented from north to south and must be raised if the groundwater lies close to the surface.
3 - 4 weeks before planting the soil must be prepared. To do this, 6 - 10 kg of compost or 40 grams of superphosphate and 10 grams of potassium chloride per square meter are scattered evenly. Then the bed is dug up and neatly leveled. In the remaining time, the soil will settle and pick up enough moisture to grow garlic. For 2 - 3 days before planting, it is necessary to scatter urea at the rate of 30 grams per square meter and shed water.
- Planting material. The teeth are carefully sorted and selected - the seed must be large, healthy and free from damage. To speed up seedlings and better development, it is desirable to germinate seed. Before planting, germinated cloves should be sprayed with a 1% solution of copper sulfate, and immediately before planting, soak for 5 minutes in a solution of Fitosporin. Similar operations are carried out for bulbballs.
 Inventory. If you plant garlic in rows at a shallow depth, then you will need a hoe and rake. If you plant rows in great depth (7 - 9 cm), then it is worth preparing a manual plow. When planting to a depth of more than 10 cm, it is more convenient to use a peg and a hammer. For convenience, the peg can draw a mark on which it will stick into the ground.
When everything is ready, the soil has settled, the seed is ready and the time limit allows you can start landing:
- When choosing a place, it is necessary to pay attention to previous cultures. Garlic with potatoes and onions has similar diseases and pests, therefore it is not recommended to alternate them. Optimal plant garlic after tomatoes, cucumbers, cabbage, pumpkin or zucchini. After what crops you can plant garlic and what can be planted after garlic, it is written in more detail here.
- Depth of planting depends on climatic and local conditions and varies in different parts of Russia. Most often planted to a depth of 5-7 cm to protect the plant from frost and freezing. In recent years, a scheme with different depths of planting has become widespread - even rows are planted to a depth of 5-7 cm, and odd rows to a depth of 10 -15 cm. This allows for a more compact planting and greater yield from the same area. When planting bulboches on seeds, the depth should be 3-5 cm.
- Landing scheme also depends on climatic conditions, but to a lesser extent. Most often, garlic is planted in a pattern of 20 cm between rows and 15-20 cm between plants. With a multi-level draft, it is possible to reduce the width of the rows and move the plants in a staggered manner. Bulbs for getting cloves can be planted according to the scheme 10 by 10 cm or 10 by 5 cm.
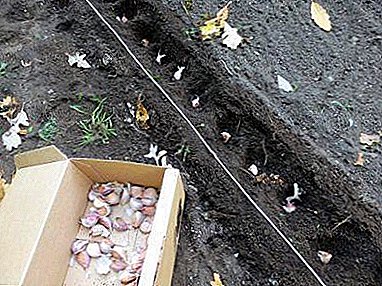 The process of planting at a shallow depth is as follows: with the help of a chopper or a small plow, grooves are cut into which the planting material is carefully laid. After laying, the row is shed by Fitosporin and buried. When all the rows are planted, the bed is additionally leveled with a rake and mulched.
- When planting to a depth of 10 cm and more, it is difficult to cut the grooves. Therefore, a peg and a hammer are used. The thickness of the peg is chosen so that the teeth easily enter the resulting hole, but do not turn over when falling. The peg is hammered to the desired depth and carefully removed. A little solution of Fitosporin is poured into the resulting well, then the clove is lowered with its roots down, some earth is poured into the well, it is watered and completely filled up.
 The process of planting at a shallow depth is as follows: with the help of a chopper or a small plow, grooves are cut into which the planting material is carefully laid. After laying, the row is shed by Fitosporin and buried. When all the rows are planted, the bed is additionally leveled with a rake and mulched.
Further care
In the fall, additional care is not needed, garlic will take root and freeze during the first frosts. After thawing snow, it is better to remove the remnants of mulch - so the earth warms up faster.
When the first shoots of the plant appear, it is necessary to feed the solution of mullein 1 to 10 at the rate of 3 liters per square meter. After 2 - 3 weeks feeding is repeated, you can add 1 tbsp. spoon nitrofoski on the bucket. This will accelerate the growth of green mass and plant development in general.
After the arrow appears, garlic must be fed with wood ash. A glass of water dissolves in 10 liters and 1 liter is added. per square meter. This will accelerate the formation of heads and increase the yield.
Important! After the arrows appear, they must be broken down. At this time the plant lays a head and forms seeds for reproduction. Therefore, if you do not break out the arrows, then the power of the plant will be spent on both directions. Therefore, it suffices to leave only part of the arrows for the formation of seeds for the next year.
Possible problems and difficulties
With careful selection of seed material, garlic is practically not sick and gives a good harvest. But there are factors that can destroy the landing:
- Little cold winter. If such a winter is expected, then immediately before the first snows it is desirable to re-mulch the bed. The mulch will hold the snow and will create an additional insulating layer.
- High water table. Garlic does not tolerate extremely moist soil, the plant quickly dies. In such a situation, it is necessary to form a raised bed.
- Clay and loamy soils. If the fertile layer is thin, then it is necessary to reduce the depth of planting. In loamy soil, garlic practically does not form a head.
In general, garlic is quite unpretentious culture. With a little experience and well-established crop rotation, it requires attention only 6 times a year: when preparing, planting, feeding and harvesting.