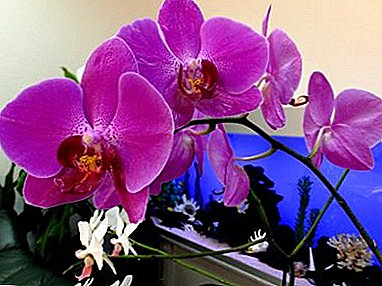
Purple orchid fascinates with its beauty and bright colors, causing delight in any person. She is well acclimatized at home and unpretentious in the care. Even novice growers can grow a plant on their own. And reading this article will make it easier and more efficient.
Most of the orchids, which today can be purchased in stores, in markets or at flower points, are hybrid. There is nothing bad in it, because it means that talented breeders worked hard on breeding such varieties to make them more resilient and adapted to environmental changes.
Where is this color?
In nature, there are many purple species of orchids. They belong to different families. Almost all the main families of orchids contain species whose flowers are painted in purple.
A purple orchid can have a solid peduncle, have an uneven shape and bend in different directions, bringing a small amount of flowers. Some types of purple orchids produce a light, pleasant scent..
Varieties and varieties with illustrative photos
The most popular varieties: Wanda, Cattleya, Dendrobium, Phalaenopsis.
Wanda

Able to grow more than one meter. It has a completely open root system that absorbs moisture from the air. This orchid does not need a soil or substrate, it can be kept in a pot or a glass vase.
We offer to watch a video about the features of growing Wanda orchid:
Cattleya

Cattleya Orchid have large fragrant flowers. Color varies from bright red to deep purple. Cattleya is quite choosy in care, so for beginners it is better not to choose such a flower.
We offer you to watch a video about the features of growing Cattleya orchids:
Dendrobium

Straight stem, linear or lanceolate leaves, stem straight. The colors are varied, the orchid of this can be three-colored, yellow, white-violet, orange.
Phalaenopsis

Rather unpretentious in care, compared to other species, is able to withstand a wide range of temperatures (from +12 to +40 degrees). Such the plant has no pronounced rest period, watering needs no more than once a week. The color varies from mauve to dark purple.
Title history
The ancient Greek writer Theophrastus, one of the first botanists of ancient times, in the 300th century BC, created the work "The Knowledge of Plants", where the word "Orchis" was used to designate certain types of orchids, which later gave the name to the whole Orchidaceae family.
Care instructions
Purple Orchid Care Tips:
- Best of all, purple orchid takes root in the western or eastern window, but does not like to be exposed to direct sunlight. He also feels well in the depths of a room under a fluorescent lamp of white light, but during the cold period it is more comfortable for him when there is more than light up to 14 hours a day.
- Preferred temperature regime: in summer + 20-25 ° C, in winter + 16-18 ° C. If the temperature is below + 13 ° C, the plant may die or get sick.
 Prefers, when in the room there is fresh air, but at the same time it is afraid of drafts.
- Comfortably at a humidity of 50-70%, if the humidity is below 50%, the plant needs to be sprayed abundantly.
- Prefers moderate watering, does not need frequent watering, should not form stagnant water. The leaves are sprayed with regularly separated water at room temperature, in winter it is done at least 3-5 times a day.
During the flowering period, it is sprayed very carefully, not falling on the flowers with water, since brown spots appear on the petals from water and leaves may fall down.
 Prefers, when in the room there is fresh air, but at the same time it is afraid of drafts.
Top dressing
The first couple of years the orchid does not need additional feeding., because the store has already provided the plant with the required amount of fertilizer. During the flowering period - in the summer, fertilizing is done 2-3 times a month, during the flowering period - in the winter, fertilizing is done 1-2 times a month. In the absence of flowering, fertilizing is done once a month, or not at all.
- Pay attention to the packaging, it should have the inscription: "For orchids."
- The correct acidity of the substrate is pH = 5.5-6.5. If the acidity is higher, then the basic macronutrients will not be absorbed.
- Fertilizer to plant and use must be strictly according to the instructions.
- To rid the plant of excess salt, carrying out the washing of the soil under a stream of warm water for 15 minutes 1 time per month.
Transfer
The orchid needs to be transplanted into a larger pot, if it is noticeable that the plant has become cramped and it has outgrown its pot.
Replanting should be done if the root system has collapsed., which can be caused by improper care of the plant.
The plant prefers the spring period of transplantation, as it transfers it better and activates all growth processes faster.
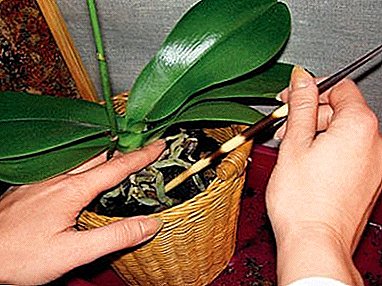 The plant is removed from the pot and the old soil is removed, the roots are rinsed under running warm water.
- Scissors are cut rotten and dry roots.
- The roots are treated with antiseptic or crushed coal.
- The pot in which the transplant will be performed is partially filled with fresh substrate.
- The roots are neatly settled and poured with the substrate inside and outside and fresh soil is poured.
- The aerial roots that grow above the surface of the pot, the leaves and the growing point remain open.
 The plant is removed from the pot and the old soil is removed, the roots are rinsed under running warm water.
We offer to watch a video about orchid transplantation:
Step-by-Step Breeding Instructions
Root shoots
- The plant comes from the substrate, the roots are cleaned, the roots are cut.
- Open sections are disinfected, powdered with activated charcoal or charcoal.
- Cut off root processes are seated in separate containers.
Cuttings
Top shoots can be propagated orchid with pronounced internodes:
- The knife is disinfected with alcohol or peroxide.
- It is hot on fire and cooled.
- Cut the stem between the nodes.
- Cuttings are disinfected with coal powder.
- Seated in separate pots.
Peduncle
- Peduncle cut off at the very base.
- 3-4 cm divided into parts.
- On each remains one sleeping kidney.
- Sections are processed with wood or activated charcoal.
- The cuttings are placed in a mini-greenhouse in a wet sphagnum moss.
- Temperature range + 25-28 ° C and maintaining high humidity.
We offer to watch a video about orchid reproduction:
Pests
- Shchitovka. The pest appears if the orchid leaves are covered with dark spots. They settle in whole colonies and suck the sap from the plant.
- White fly. A butterfly that feeds on orchid juice.
The appearance of a butterfly on an orchid can cause changes in the habitual color of the leaves, the flower weakens.
- Redhead. The parasite appears if white fluffy lumps appear on the stems. The plant may fall and the leaves turn yellow, and it can die.
Diseases
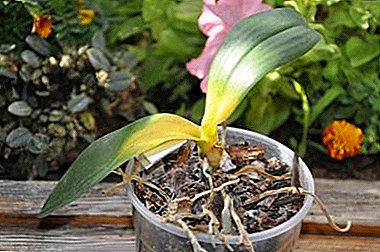 Abundant watering causes - Brown rot.
- High temperatures and high humidity cause Root Rot and Powdery Mildew.
- Low temperature in the room causes black rot.
- Lack of air circulation causes - Fusarium rot.
- Reduced temperature with high humidity causes gray mold.
- Excessive fertilization, bright lighting in the autumn and summer period causes - leaf spot.
- High humidity and stagnation of water in the axils of the leaves causes - Anthracnose.
- Viral diseases.
 Abundant watering causes - Brown rot.
After reading the article you can avoid a lot of mistakes that adversely affect the care of orchids. If you follow all the instructions correctly, you can ensure the proper care of the plant, its longevity and flowering.
We offer to watch a video about orchid diseases and pests: