Every man who has a garage, seeks to use its own area to the maximum. And many decide to build a cellar in which you can store tools, conservation, root crops and much more to ensure free space in the garage itself.
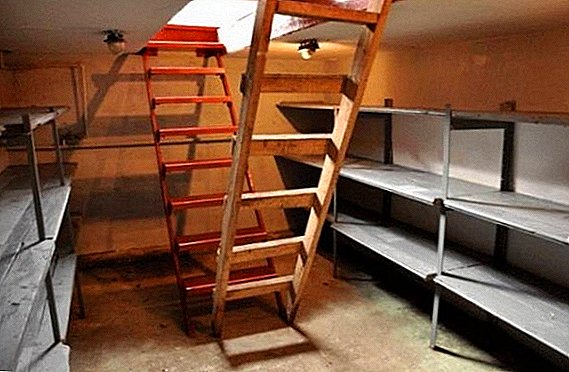
What you need to know when building a cellar under the garage
Before you start building an underground storage facility, you must carefully prepare and decide not only the feasibility of such a facility, but also understand how underground communications are located under the garage, find out where groundwater flows. 
Also very important point is the type of soil in the place where the garage is located, because the size of the basement will be directly dependent on this, as well as the amount of materials that need to be stocked up.
Learn how to build a cellar in the country, how to make a plastic cellar.
Types of cellars under the garage
Basements in the garage can be divided according to the depth of their location relative to the garage itself.
There are two main types of cellars:
- Cellar, recessed in half. The depth usually does not exceed 1 m. The main advantage is that such a basement can be made, even if the garage is standing on damp soil.
- A more popular type of garage cellar - fully recessed pitthat is, the garage has a full basement in which a person can come down and stand up to his full height, because its depth is 2-3 meters. If it is decided to construct a “buried” basement, the study of the location of groundwater and communications is mandatory.
Important! The distance from the underground objects to the basement of the basement should be at least half a meter.

Choosing the right materials for construction
The second most important point after the exploration of underground objects is the correct selection of the necessary materials, because when buying unsuitable building elements the underground structure risks to be unreliable.
The first, of course, is the foundation. For its pouring it is necessary to use concrete, which is based on cement M400 or M500, intended for the construction of massive structures, and accordingly, is more durable and reliable (the same solution can be used for plastering floors and walls).
Walls can be made of bricks, foam concrete, stucco-coated foam, or other materials. For protection against water roofing material is best suited.
Important! For the laying of the walls is not recommended to use silicate brick.

Building
So, the materials have been selected, a pit of the appropriate size has been dug out, and it is time to start the direct construction of the underground room.
Foundation construction
The foundation is the main part of any structure, so its construction must be approached with particular seriousness.
For the arrangement of the summer cottage, you will also be interested to learn how to build a tandoor with your own hands, a Dutch oven, how to make a warm floor, a summer shower, a sofa from pallets, how to install a visor over the porch, how to warm the basement of a foundation, how to build a pool, how to build bath, how to make a blind area at home with your own hands, how to make concrete paths.
In order to build a foundation "for centuries", it is necessary to follow the following procedure:
- The bottom of the dug pit must be filled with a dense layer of gravel or broken brick (at least 3-4 cm) and carefully leveled.
- Crushed stone (brick) need to fill with a dense layer of concrete (6-8 cm). Concrete must be poured carefully, layer by layer and avoid any irregularities. Concrete must completely harden.
- It is necessary to lay a ruberoid layer on the base. In order to attach a waterproofing, you can use melted resin. As an additional protection against groundwater, a separate drainage system can be constructed.
- We make the formwork (the foundation of the foundation, which is subsequently filled with mortar), using solid wooden boards.
- Fill the mixed solution and leave to freeze.

Did you know? 40% of the total cement produced in the world is used by the Chinese.
Masonry walls
For laying of reliable walls it is necessary:
- To build a wooden formwork with a height of 35-40 cm and fix with nails and slats.
- Pour concrete, let it harden.
- Lay out the next 30 centimeter layer of formwork and also pour concrete and let it harden.
- Repeat until the full gulf of the entire height of the walls.
As walls, you can use ready-made plates of reinforced concrete, but they must necessarily be insulated with special mineral wool. You can also lay a brick, but it takes a lot of time and effort.
Important! Finished walls can additionally be covered with a layer of acrylic paint to provide greater moisture resistance.

Ceiling construction
The best material for the ceiling will be reinforced concrete - it is both durable and reliable.
Such a ceiling will never let you down:
- In one of the reinforced concrete slabs it is necessary to make a hole that will serve as the entrance to the basement.
- The laid plates must be covered with a thick layer of resin and insulated using cement with sawdust or a thick layer of glass wool (18-20 cm).
- If necessary, additional insulation needed a separate layer of plaster.

Cellar waterproofing
Waterproofing is an important stage of construction, because dryness is the key to the durability of any bonding material. The best way to protect a room from water is to cover the walls with a generous layer of hot bitumen.
This will be enough with dry soil and the absence of groundwater. However, if the soil is quite wet or there is groundwater, it is worth covering both the walls and the floor. It is necessary to put a double or even triple layer of roofing material.
For decorating the suburban area, it will be useful for you to learn how to make a waterfall with your own hands, garden swings, a fountain, a bed of stones, rock arias, a dry stream.
Cellar insulation
Thermal insulation also plays an important role, because without this process, all previous work will go "down the drain." The best material for cellar insulation is polystyrene foam.
Important! Fix polystyrene is necessary on the outside of the walls. If it is fixed inside, there is a big risk of condensation.
The thickness of the insulation should be at least 5-7 cm. Special attention should be paid to the insulation of the ceiling. It must be insulated using any insulating material on the inside. 
Cellar ventilation
Another important point is the ventilation of the room, because without the necessary air exchange products in the basement can not be stored, because the stale air will spoil them almost instantly. There are two types of ventilation: passive (natural) and forced (with the help of special equipment - a fan).
Learn more about what should be the ventilation in the cellar.
Passive
Passive (natural) ventilation is very simple. Two pipes are necessary for this: inlet (longer) - a pipe designed to lead the incoming air into the room; exhaust (shorter) - wire for warm air leaving the room. 
In order to build a natural hood, you must:
- Prepare pipes of suitable size. The end of the chimney should go out to the level of at least 30 cm from the ground level and 20 cm deep into the room from the beginning of the ceiling. The end of the inlet pipe should also go 30 cm outside, and the room should be at a level of 10-15 cm from the floor. Thus, the cold (fresh) air goes down the room, and the processed (hot) rises up and goes out into the chimney under the ceiling.
- We make holes in the ceiling and near the floor.
- Insert and fasten the pipe.
- The ends on the street must be closed with an iron grid to protect against debris and small animals.
This ventilation system is extremely simple, but it is effective only in winter, when it is warmer in the basement than outside. In summer, the temperature becomes almost the same, and such ventilation will not work.
Forced
Equipping a room more efficient - forced ventilation is identical with passive ventilation. The only difference is that a special fan is included in the system (the power of which is calculated depending on the size of the room). 
Thanks to the simple device, the basement will be well ventilated at any time of the year, and there will be no problems with the air. Many basement owners strongly recommend not being lazy and immediately install a forced ventilation system.
Did you know? The first forced ventilation systems were used in the nineteenth century to ventilate the holds of ships. Ventilation was used for the speedy drying of products from moisture.
So, having deeply studied the issue of building a basement in the garage with your own hands, we can conclude that this is not only feasible for any man, but also quite simple. The main thing is to follow all the rules and not be lazy to isolate your basement well from groundwater, to provide thermal insulation and adequate ventilation.
In the case of all properly executed works, you will find an excellent basement room where you can store not only various tools, but also conservation.
Feedback from network users
I didn’t waterproof the walls, when building a brick box between a brick wall I poured clay back, tamped it up, shed water. Roofing material was laid on the clay floor, then it was poured with rubble, made a screed. The ventilation of the inflow and the exhaust from a plastic pipe of 50 mm was made, it was brought to the roof, the second pipe was still on the floor (unfinished). Everything is wonderful, there was no water, the potatoes did not freeze (it was -30 this winter), the only thing BUT, the roof of the cellar - the metal was in drops of moisture. This problem has not yet been solved.