Any global construction - house or cottage - begins with a utility room, referred to as "shed". In this article we will consider the options for the structure, let's look at the nuances of construction with our own hands.
Why do you need
The shelter is a universal structure, it serves as a room for construction tools and material, for shelter from the weather, you can stay in it for the night. These are not all the functions that a room can take on; after construction, it can serve:
- barn (for storing inventory);
- workshop;
- a bath;
- summer kitchen;
- closed gazebo;
- guest house.

Location
The location of the building will depend on its purpose in the future:
- if it serves as an economic room for storing firewood, equipment and other things, then it should be placed where there is free access to it, at the same time it should not be evident;
- it is desirable to locate the workshop closer to home in order to be able, without wasting too much time, to enter and exit;
- it is better to place the sauna or bath away from the house and other buildings, observing fire safety;
- in the case of the planned transportation of a mini-house to another place, its location will be convenient when leaving the territory.
We recommend reading about how to build a bath, a cellar in the garage, a veranda, a greenhouse of window frames and polycarbonate, as well as a summer shower, a gazebo, a wooden barrel.
The size of the shed is again dependent on plans for the future, as well as the layout of the room. In any case, at first you need to count on the presence of a bathroom, a place for rest, comfortable for at least two people, as well as a dining place and a few meters for tools and building material. Compact and convenient dimensions, for example, 6x2.5x2.5 m. 
Types of cabins
Depending on the material of the assembly method, there are shield, frame and wooden constructions.
Shield
This is a temporary structure, made of inexpensive and most often low-grade materials. In them warming and communications do not reflect. It is a light, cheap structure that is easy to transport from place to place. Most often used only during construction. 
Frame
This room can be both temporary and permanent. It can be insulated, supply water and electricity. After its intended use, it can be converted into an arbor or workshop. Collect such a structure from a wooden bar with a thickness of about 50 mm.
Wooden
A solid premise of multi-purpose. Mini-building can be equipped with everything necessary for life: light, water, bathroom. Wood - the material is expensive, but environmentally friendly and durable, especially with appropriate processing. 
Step by Step Construction Instructions
For the construction will need tools and materials that you need to prepare in advance. You will also need a drawing of the desired structure. 
Foundation
There are three main types of base for a small structure:
- columnar - consists of bearing columns-supports, the easiest option for light construction, it will be built for our design;
- tape - it requires more time and material, construction labor, a trench is being dug for it, a formwork is prepared from reinforcement rods, fastened with concrete and within a month they wait for the base to set and the concrete to harden; this type of foundation is suitable for brick and stone buildings;
- monolithic - also requires a lot of time and cost (formwork, concrete), it is difficult to lay it alone, the advantage of the monolith is that its surface serves as the basis for the floor.
We will make a wooden shed and a column base for it. 
Base laying:
- Looking at the previously drawn scheme, measure the dimensions for the foundation.

- Then pegs are driven in along the perimeter and the lighthouses are tightened.
- Under the pillars they dig out the required number of holes, with a certain distance between them. Gravel is poured at the bottom of the pits, then sand; this “cushion” will keep the soil from deforming when the seasons change.
- Bricks are laid on the sand, they are tied together with a mortar. On the sides of the pillars make cement casting.

- Ruberoid pieces of roofing are laid on the posts for waterproofing.
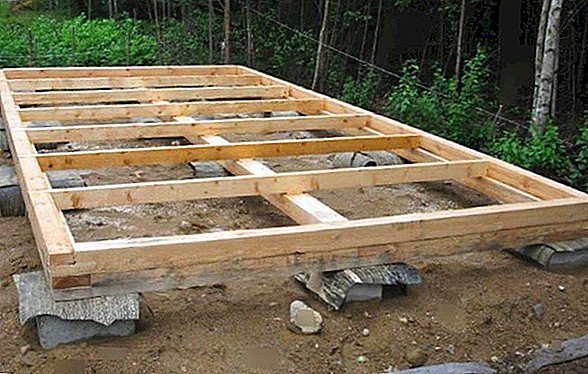
- From the wooden bar perform the bottom strapping and the basis for the future floor.


Important! Since the building will carry electricity and water, it is necessary to take measures to protect wooden materials from moisture and fire. There are special compounds from moisture and rotting. Any oil-based antiseptic will also work; there is an impregnation called a fire retardant against fire, many of them additionally protect wood from insects.
Walls
After laying the foundation and tying the base under the floor, load-bearing vertical supports are made of timber with a cross section of 100x100 mm.
When assembling, please note that a single-shed roof is planned; for this, the front beams are not installed in the same vertical plane with the rear and front, but 50 cm higher for the roof slope. We put temporary bracing for the support structure.
Next steps:
- We strengthen the frame with additional racks, where we consider the location of the door and window openings.

- We install two racks for each window and horizontal supports on the border of openings from a 50x50 mm timber.
- We change the temporary braces on permanent, strengthen.


Roof and floor
Roofs for small buildings use either gable or single slope. For a gable roof will need more material and more labor. The advantage of such a roof in a free space between the roof and the ceiling of the building, which can be used as an attic.
Learn how to make a gable and hipped roof, how to make a mansard roof, how to cover the roof with ondulin and metal tile.
For the type of structure we have chosen, an inclined roof would be ideal: minimum material, minimum physical effort.
We collect the roof:
- We trim vertical pillars using beams 100x50 mm.
- We connect the bottom and top of the base with rafters, put on the edge. We consider the protrusion beyond the perimeter of the walls by 15 cm (roof overhangs), sew up the ends with a board.
- From above we sheathe sheets of plywood.
- The top can be covered with any durable and waterproof material.
The example in the figure.  We install the logs for the floor, put on an edge in increments of up to 60 cm. We nail a wooden bar to the side surface of the boards, which will serve as support for the subfloor. Laying the floor insulation in the figure below.
  After laying the floor clean from the board.
Windows and doors
When installing the frame and equipping the openings under the windows and the door, it is necessary to carefully measure, use plumb lines and level so that there is no bias when installing the windows and the door. Windows and doors must be ordered in advance, guided by the dimensions indicated on the drawing of the desired building.
Did you know? Before the appearance of glass windows in European countries, instead of glass, windows were covered with a stretched bovine bubble film. Only in the 17th century, glazed windows of small squares with lead binding appeared at the court in France.
Electricity
Outside, an electricity supply line rushes through the air, it looks like this.  We conduct electricity to the house. On the outside we attach the bracket to the wall, to it - the main cable, through the drilled hole we run the cable into the interior of the room.
Important! To protect against leakage current install RCD, then the automatic control panel.

For internal wiring, you can purchase cable channels made of plastic, it is convenient and aesthetic. For the line leading to the heaters, you need a cable with a large cross section, for example, 0.75 square meters. mm (based on single-phase voltage) is suitable for a device with a capacity of more than 2 kW.
The wire leads in the walls are carried out in a metal case. It remains to install the desired number of outlets. Do not forget about street lighting.
Heating
The best option for heating will be an electric convector, given the electricity carried out. For heating a small room enough device with a capacity of 1.5 kW. It is advisable not to save on the device, cheap convectors are usually made of thin steel, which, when heated, produces a crackling sound.  Electric convectors High-quality device does not create noise and works without interruption. Installing wood heating is not entirely relevant, since wood costs more than electricity bills.
In addition, it is necessary to upholster the space around the furnace with iron sheets, to conduct a chimney, which also needs to be insulated, for example, with basalt fiber with fireproof properties, and these are additional costs.
Water supply
Since the shed plans to still be used in future plans, the water supply will not be superfluous. Both pipes - plumbing and sewage - are brought through the floor. Trenches for laying pipes dig in advance in accordance with the plan. How it looks, look at the picture. 
We advise you to read about how to independently install a septic tank, air conditioning system, water heater, sewage system, as well as how to make water from the well.
Exterior finish
For finishing wooden dog houses it is logical to use the wall paneling. Manufacturers today offer durable and durable cladding materials:
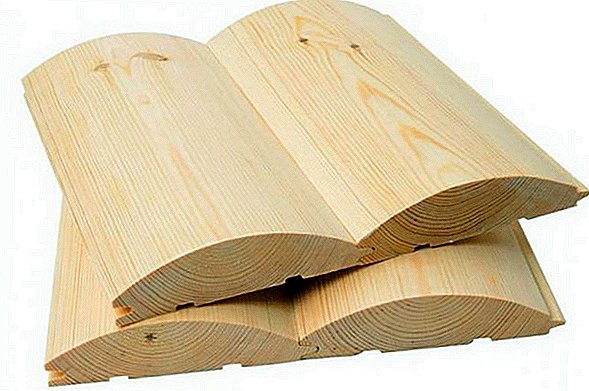
- trim from imitation timber - it is not difficult to assemble, has grooves-latches, the material is moisture resistant (16-18% moisture content of the material);

- lining - it is distinguished by excellent quality, the moisture content of the material is 15%, it is equipped with grooves, a smooth surface is assembled vertically;

- dried lining - budget option, made of conifers (spruce, pine);

- block house - the lining imitating a round log looks expensive and beautiful.


For work, depending on the material, you may need:
- circular saw / jigsaw / handsaw for wood (which is available);
- grinder;
- screwdriver and screws;
- staples or tongs;
- planks made of wood;
- gon;
- pencil;
- stapler;
- level.
It will be useful for you to read about how to choose a saw, screwdriver, jigsaw, electric saw and chainsaw.

Collect lining boards both vertically and horizontally.
Conduct work in this order:
- Install the crate of thin strips, it will provide air circulation.
- The protective film is fixed on the slats with an overlap of up to 15 cm with a stapler.
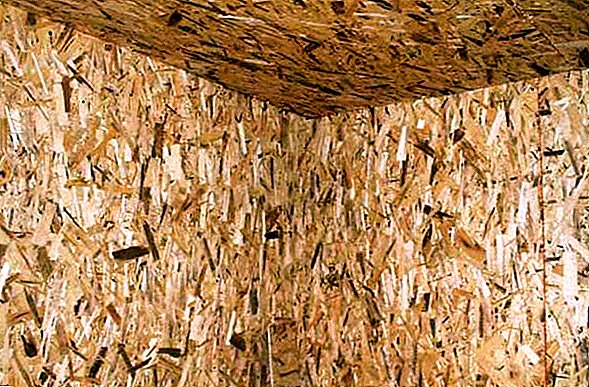
- Next, for additional insulation stuffed plate OSB.
- The last stage is the installation of the wall paneling.

Interior finish
For interior decoration will need the same tools as for the exterior. Additionally, you will need insulation for walls - basalt wool.
Did you know? Mineral wool appeared due to the observation of English industrialist Edward Perry. He noticed that thin fibrous filaments were formed from splashes of molten slag. In 1871, the first production of this heater was launched in Germany.
Plating options:
- plate OSB - moisture resistant, with protection against ignition;

- Chipboard (laminated) - it is not subject to influence of temperatures, has a big color palette;

- MDF - isolates noise, absorbs heat, ideal for covering the bathroom.


Internal lining is performed according to the following scheme:
- The crate is stuffed and basalt wool plates are inserted into its grooves.

- Top is packed with a protective film.
- Then stuffed plates of finishing material.
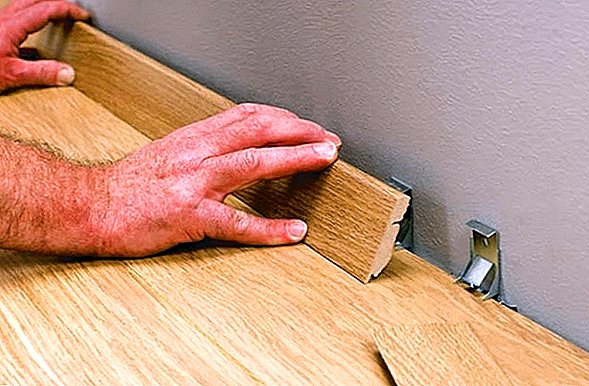
- The final stage - plinth, around the perimeter of the ceiling, the corners of the walls, the floor, it will hide the joints of the plates and further strengthen them. If there is a desire to glue the wallpaper and lay linoleum on the floor, then the plinths are packed after these works.


It will be useful for you to read about how to properly glue the baseboard, how to put the plastic window sill yourself, how to install blinds on the windows, how to put the socket and the switch, how to lay the tile on the floor and on the wall in the bathroom, how to install the sink on the countertop, how to do it yourself to make a wooden floor warm, how to lay a warm floor under the laminate, linoleum and tile.
Variants of buildings: By itself, the shed is a temporary phenomenon, but if you carefully and carefully approach its construction, the result will be a habitable, equipped with the necessary communications, a warm building. How to know in which case it can be useful.