The hen is one of the first birds domesticated by man. Her growing and breeding in their own area do not pose any problems. But at the same time you need to take care of her home. Indeed, unlike its distant wild ancestor, a poultry bird cannot live in the open.
Choosing a place under the barn
When choosing a place for the future of the shed, it is necessary to proceed from the fact that the hen for "happiness" (and therefore good survival, rapid weight gain and high egg production) need: lots of light, no drafts and temperature fluctuations, cleanliness, dryness and peace.
Read more about where to place the chicken coop.
Knowing the basic needs of the bird, we can formulate the following recommendations:
- Choose a place for a chicken coop on a small hill or at least not in a lowland. The interior of the room can be protected from moisture, but a yard for walking will be organized next to the house, and if rain drains flood it from time to time, walks will become a problem.
- The building is best placed with the long side in the direction from east to west, and the windows should be displayed either to the east or to the south, so that as much light as possible can penetrate them. The door and yard for walking is also recommended to provide on the east or south side of the building.
- Do not plan a chicken coop in the immediate vicinity of the barbecue area, swimming pool or space for active games. Apart from the fact that the birds themselves are not very good at noise and bustle (stress will immediately affect egg production), but the smell coming from the house, no matter how good it is cleaned, is also a bad backdrop for outdoor recreation. A good option is to divide the places "for people" and "for birds" as a hedge.

Determine the size of the future barn
The choice of the size of the chicken coop directly depends on the planned size of the livestock, as well as on which chickens we plan to keep. As is known, numerous breeds of poultry are divided according to purpose into three categories: egg, meat and meat-egg.
Important! The optimal number of chickens in the house is 3 individuals per 1 m² of area. Meat and meat-egg breeds allow an increase in this rate to 4-5, but too much crowding increases the risk of damage to poultry by various infections.
Chickens bred for meat are traditionally larger than their “egg” relatives, but, oddly enough, it is the latter that manifest higher requirements for the availability of free space. Meat chickens are calm, phlegmatic and stress resistant, and egg chickens are active and mobile.
Otherwise, the following requirements are imposed on the size of the shed:
- height - at least one meter;
- base aspect ratio - ideally 2: 3.
 Let us consider in more detail the technology of construction of the shed with the dimensions of the base 2 to 3 meters and a height of 1 meter. In such a house quite comfortably accommodate up to 20 adult chickens.
Did you know? Silence in the hen house is an unnatural state. With sounds, this bird accompanies all more or less significant events in its life: it laid an egg, saw the owner, the impudent neighbor occupied the nest, etc. Even the most tranquil breeds of chickens produce a constant monotonous hubbub. Moreover, it is precisely the ringing clucking that says that the birds are healthy.
Build process
For successful construction, it is always necessary to sketch out at least a simple project. Even if you are well aware of the future construction of the shed, have seen a similar structure with a neighbor or have studied a video instruction on the Internet, one should not neglect the design stage.
It is this preparatory work that will allow you to correctly select and accurately calculate the amount of materials, determine the sequence and timing of the work, list the necessary tools and, as a result, save time, money, money and nerves. 
Tools and materials
When building a chicken coop, you will need the following materials:
- sand, cement, crushed stone, silicate brick - for arranging the column foundation;
- bars, boards, mounting rails - for the construction of the frame;
- glass - for windows;
- sheets of plywood ("lining", hardboard or OSB) - on the inner wall cladding;
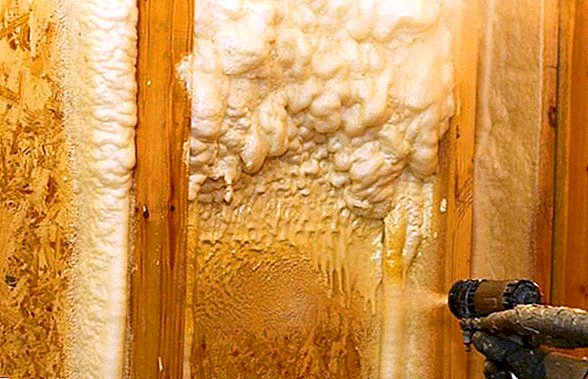
- sheets of foam plastic (mineral wool, spun, foam plastics, shingles) - for outdoor and indoor insulation;
- slate, roofing material, soft roof;
- metal pipes (fittings, rods), metal mesh - on the fence area for walking;
- ceramic tile or linoleum - as protection on the floor;
- nails, screws, wires, metal corners and other fasteners - depending on the materials available and the chosen technology;
- sandpaper;
- water-based paint or lime mortar - for interior treatment of the room.

Materials do not have to be new. Most of them can be obtained by disassembling old furniture; Wooden windows are also great, as they are being replaced by plastic windows in urban apartments.
Did you know? It turns out that the chicken is able to remember its home and its inhabitants. If you pick up a layer from the house and return it back a few days later, the "family" will remember the product and accept it as their own!
In addition, you need to get the necessary tool:
- a set for the production and laying of concrete mix (trowel, shovel, trough, construction mixer, concrete mixer);
- drill (screwdriver);
- jigsaw, circular saw, handsaw - for working with wood;
- hammer, nail puller;
- grinding machine ("Bulgarian") - for work on the metal;
- level, tape measure, protractor, ruler, etc.

Foundation laying
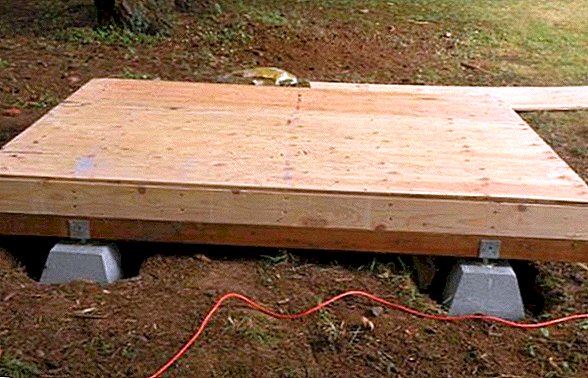
For a small house, as a rule, use a columnar variety of the foundation. Separate support columns are laid out of brick or cast from concrete, which allows you to raise the entire future structure above the ground to protect against flooding, dampness and invasions of small predators and rodents.
We advise you to read about how to make a barn for ducks and goats with your own hands.
Technique bookmarks looks like this:
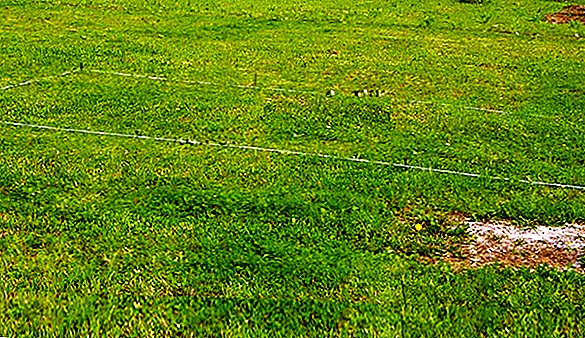
- At the proposed construction site make markup for future columns.
- The distance between the columns is taken from one and a half to three meters, depending on the thickness of the bar for the primary harness. Thus, on the perimeter of the base of the house in the size of 2 by 3 meters, you will need only 4 or 6 columns (for tying from timber more than 80 mm thick).
- At the place of the future foundation, a fertile layer of earth is removed to a depth of 20–25 cm and with a 40–50 cm exit beyond the basement. The prepared site is leveled using a level.
- Under future columns, holes are dug 50 cm deep and 30-40 cm in diameter. A layer of crushed stone 2-3 cm thick is poured at the bottom of the holes obtained and pounded.
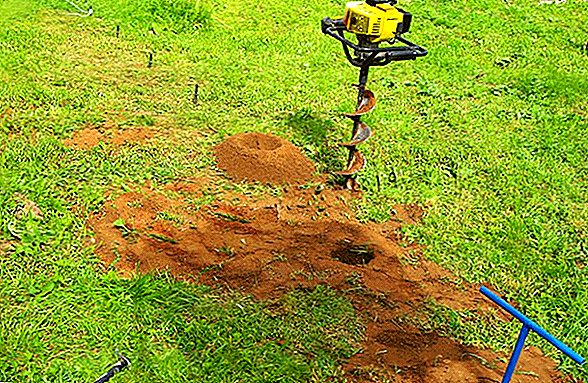
- Pre-prepared formwork is installed in each hole so that all formwork rises above the ground by 15-20 cm. There is an easy way to make a formwork for a concrete column of roofing material, simply turning it in two layers into a pipe with a diameter of 20 and a length of 70 cm and fixing outside scotch tape. All formwork are secured in their pits by pouring rubble and earth outside.
- Concrete is prepared and poured into the formwork. Depending on the weather conditions, the freshly filled posts need from 5 to 7 days for complete solidification. To prevent the solution from washing out by rain or drying out in the sun, the posts should be covered with polyethylene.


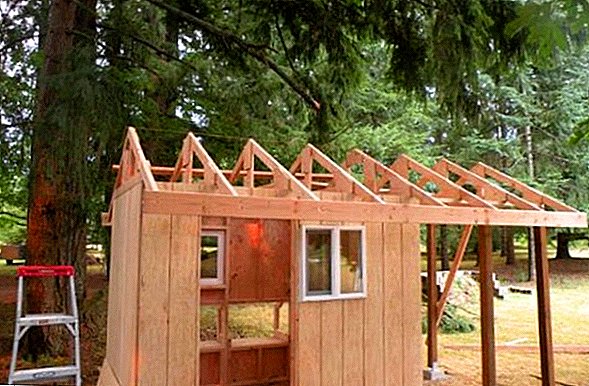
Construction of the frame
While the column foundation dries, you can do the cutting of existing lumber in accordance with the project. At this stage, you can cut almost the entire frame, then to quickly and easily assemble it on the finished foundation.
It will be useful for poultry farmers to read about how to choose the right chicken coop, how to make a chicken coop with your own hands, how to build a chicken coop for the winter, and how to make a chicken coop out of a greenhouse.
The assembly sequence is as follows:
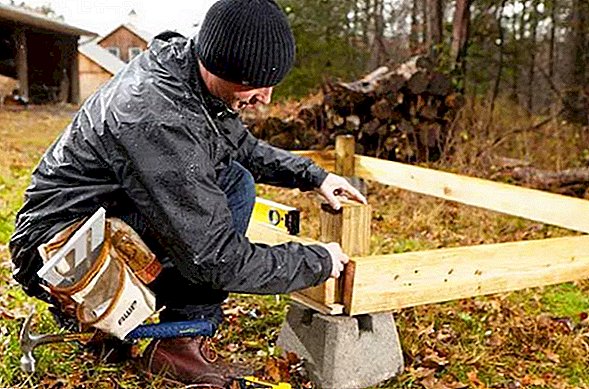
- From the wooden bar using the half-wood corner joint method, the bottom strapping is assembled and fastened to concrete posts with anchor bolts. Moisture insulation (several layers of roofing material) is laid between the concrete and the bottom strapping.
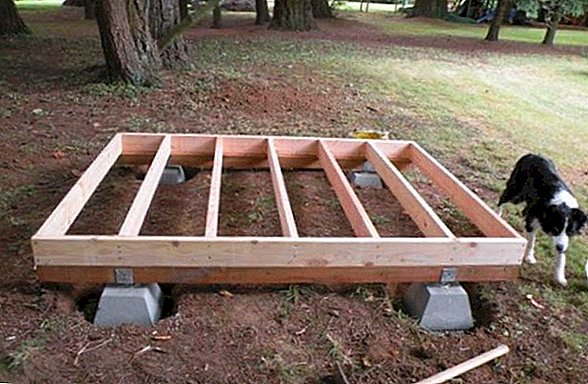
- On the outer surface of the bottom trim is screwed board, forming a box. Lags are fixed inside the box, over which the floor is subsequently laid. It is recommended to use a board as a floor covering on logs.
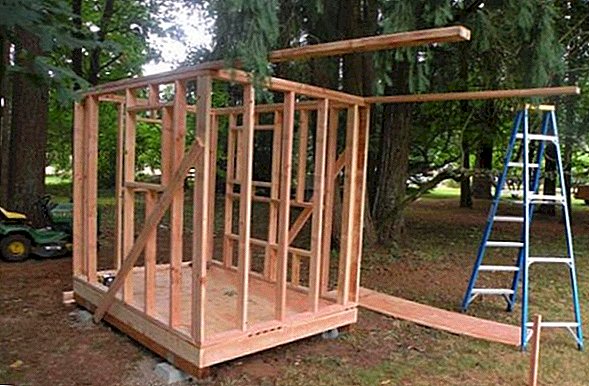
- Vertical frame beams are installed on the assembled base by means of metal corners: four corner beams and also intermediate beams at the locations of the doors and windows according to the project. It is recommended to use beams with a cross-section of at least 50 mm, which will subsequently allow the house to be properly insulated.
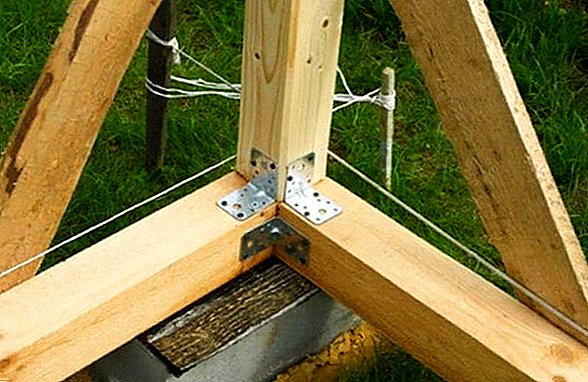
- The upper frame of the frame is also made by means of steel corners (to reduce the cost of construction, metal corners can be replaced with short wooden bars with a precise rectangular section). Before finally fixing the upper trim bars, be sure to check the strict vertical position of the supporting corner beams.
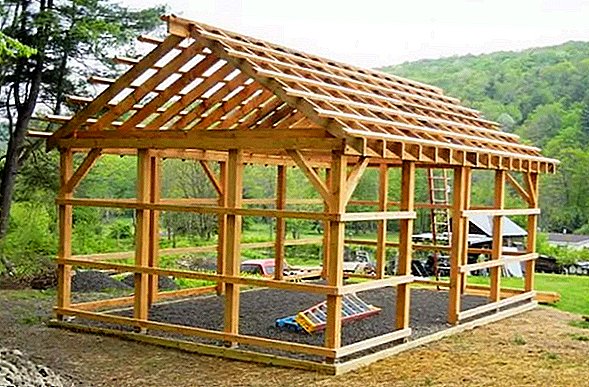
- Upon completion of the upper trim, the roof truss is assembled according to the project. This is perhaps the most difficult part of the assembly. The number of rafters and the distance between them depend on the method of roof insulation (insulation dimensions) and the roofing material used.


Insert windows
The location, optimal size and number of windows in the hen house should be determined at the design stage.
The basic rules are:
- the total area of the window openings should be at least 10% of the floor area;
- the number of windows should ensure uniform illumination of the interior of the chicken coop;
- windows should open;
- Windows should be protected by a strong and fairly fine mesh.
Find out what should be a light day in the hen house, how to organize lighting in the winter.
Installation of windows in the chicken coop (as well as doors and manhole) is done after the completion of the upper frame of the frame.
The sequence is as follows:
- Between the intermediate vertical beams of the frame, intended for the formation of windows (doors) at a height provided for by the project, horizontal partitions are installed in the same plane with the beams from the same beam as the beams themselves.
 The resulting openings will serve as window pans.
 - Under the size of the boats, window frames are made of wooden slats in half the thickness of the frame beam.
- Glass is cut to the frame size and fixed in it.
- The resulting windows are attached to the container with the help of curtains from old furniture (after the final wall covering).
 The resulting openings will serve as window pans.
Important! Windows can be opened both in the horizontal plane and in the vertical, both outside and inside the building. In general, this is a matter of taste, but the most practical option is when the windows open to the outside of the chicken coop, in a vertical plane. This will allow you to open and close them, without going into the barn.
In addition to the windows, there should be a door in the hen house. It must be installed so that it opens to the outside, without hurting the nearby birds. It is also recommended to make in the door a small manhole with a latch through which the birds will get out into the courtyard for a walk.
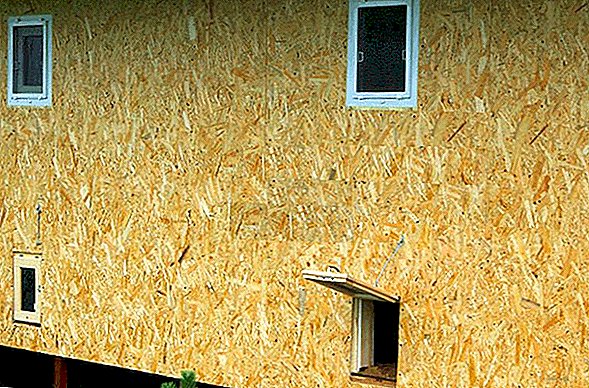
Wall cladding
Any material based on natural wood (boards, plywood, chipboard, OSB, etc.) can be used as a plating. When choosing material for interior decoration of the house, it should be possible to paint it (water-based paint) or whitewash (lime mortar) at the bottom. The PSA or plywood is best for this, to a lesser extent - board or chipboard.
Read more about how to properly disinfect in the chicken coop, as well as how to remove fleas, ferrets, rats from the chicken coop.
Plating order:
- Cladding start with a deaf end opening from the inside of the frame. A sheet of cladding material is applied to the vertical beams of the frame and is screwed with screws (nailed). In the case of using hard skins (for example, OSB), it is recommended to pre-plan and drill holes for screws (or nails) in the sheathing material.
- Subsequent sheets are laid out and installed in such a way that the overlap joint is obtained in the corners and the end-to-end joint on the vertical intermediate beams.
- The locations of the doorways and windows are pre-marked on the casing with a pencil and cut with an electric jigsaw.
- The inner lining is completed with an end wall opposite to that with which the lining began.
- In between the beams of the frame from the outside fit insulation (mineral wool - the best option for this example).
- Insulation outside is closed vapor barrier membrane (as an option - a simple plastic wrap), which will provide a vapor barrier. The film is neatly nailed to the beams of the frame to prevent ruptures.
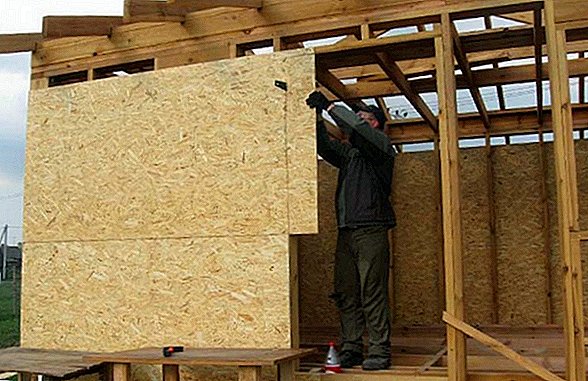
- Next is the outer skin. Fastening of the casing should be done exclusively to the frame beams, so it is important to pre-mark and drill holes for nails or screws in the cladding sheets.
- Upon completion of fastening the cladding material, the inside corners of the room can be sealed with a wooden corner, and the door and window openings can be decorated with platbands.


You will surely be interested in reading about why chickens peck at each other, what to do if chickens do not carry eggs and peck badly, do you need a rooster for eggs to carry eggs when the young chickens begin to rush, and how to keep ducks and chickens together.
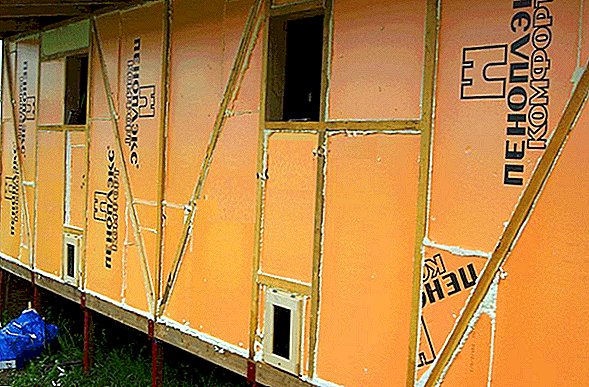
Warming
The method of wall insulation depends on the region: the colder and more severe the winter, the more attention should be paid to thermal insulation.
To solve the problem, there are such options:
- usual careful sealing of slots with tow or moss - suitable for a mild climate or cold-resistant breeds of chickens;
- the previous method, supplemented by the inner lining of wooden boards;
- external wall insulation using foam plates; if necessary, additional protection can be sheathed with "clapboard" or flat slate;
- the use of a “sandwich” of two layers of boards between which the penoplex, mineral wool or other heat-generating material is laid, including improvised (for example, mixed with lime and layers of dryly rammed leaves, sawdust, needles, etc.);
- upholstery walls with two layers of shingles.

Did you know? Poultry farmers note the amazing property of chickens to cause ... dependence. Many breeders have fallen on this hook: first, a person decides only to have a rooster and a couple of hens, but in the near future has a serious flock and its own incubator, and the more the population grows, the stronger becomes the compelling need to expand!
Floor laying
For the construction on the column foundation, the most acceptable option is the floor of the floor board, laid on the logs. Laying of such a floor can be made at the very beginning of construction, which will make it more comfortable to perform subsequent work on the construction of the frame and covering inside the room. 
One way or another, you should follow a few simple rules:
- All structural elements of the floor (strapping bar, box, logs, floor board) are recommended to be treated with antiseptic materials and moisture-proof coatings before final assembly. This will permanently protect the structure from mold and rot.
We advise you to familiarize yourself with the various options for arranging the floor in the hen house.
- If the floor was going to begin construction, it is better to protect it during the construction of the chicken coop (for example, polyethylene or cardboard sheets).
- Since the floor is the most vulnerable spot of the bird's dwelling, it is better to provide a protective cover for it, which can be easily reached from the cleaning house and put into place. For this purpose, well suited, for example, pieces of old linoleum.
Roofing device
For a small chicken coop, a lean-to roof is quite suitable: it is easier to manufacture and install. Двускатные конструкции следует использовать лишь там, где возможны сильные снеговые и ветровые нагрузки.
Important! Обустройство кровли целесообразно проводить сразу после возведения каркаса и установки стропил.
Процесс настила утепленной кровли выглядит так:
- Rafters outside are covered with a waterproofing film, which can be used as a thick durable polyethylene. The entire area of the truss part should be covered with one hermetic web. If there is no such size of canvas, it should be pre-glued with adhesive tape from the available strips of material, putting them "overlap" with overlapping of at least 20 cm.
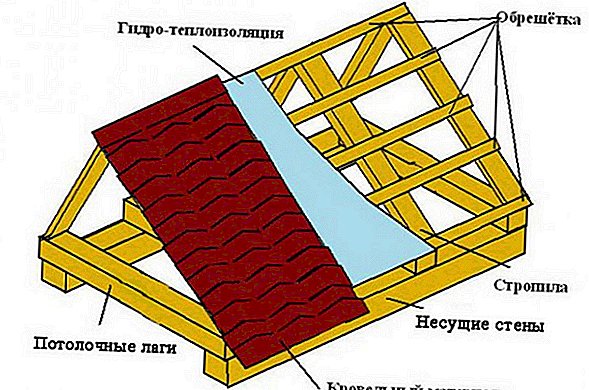
- On top of the waterproofing film is attached obreshetka, calculated under the existing roofing material. As the main roofing material, wavy slate or soft roofing can be used.
- If soft roofing is used, a rigid base is additionally laid over the batten - plywood or OSB.
- The basic roofing material is laid on the foundation prepared in this way.
- Warming of the roof can be made by placing a heater (mineral wool) directly in the interstitial space, followed by the inner lining of the board. This method will not require the arrangement of an additional horizontal ceiling, which will lead to savings in money and materials.

Preview walking
Most breeds of chickens need a free range. Too short walks in the fresh air, not enough spacious area and, moreover, the constant content of birds in closed cages adversely affects the egg production.
In addition, it deprives the farmer of the opportunity to save money on feed: in this case, the diet should include an additional amount of protein food, while in nature the chickens solve this problem on their own by digging out various worms from the ground, catching beetles, small lizards and other animals .
Determining the size of the yard for walking, it should be assumed that each individual should account for 1-1.5 meters of area (for meat breeds, this indicator can be determined by the lower range parameter, the egg and meat-egg spaces need more).  It is desirable that during the walks the chickens can enjoy some greens, not just insects, but the farmer needs to be prepared for the fact that any vegetation that will be planted in the territory allocated to the birds will be instantly destroyed.
Did you know? Experienced owners know that the easiest and cheapest way to prepare a site for a quality lawn is to first place a yard for walking chickens on it. A bird, better than any equipment, removes all weeds from a plot, and not only tears off the above-ground part of them, but also digs up the roots.
Therefore, experts advise to divide the courtyard into several parts, or simply in half - on one half to walk the birds, and the other to sow grass. Thus, the seedlings will be able to grow a little. When organizing the site, it is necessary to provide a shaded area on it, where chickens will be able to hide from the scorching sun.
Here you can also install trays for dry bathing (a mixture of ash, sand and clay), tanks with rakushnyak, drinking bowls, and for egg breeds even nests for laying eggs.
Video: walking for chickens with a canopy do it yourself The shelter can be arranged by making a small visor at the roof of the house, using polycarbonate, roofing felt or any other suitable material, but it is even easier to use natural sources of shade - for example, from trees growing nearby or outbuildings.
We recommend to get acquainted in detail with the types of ventilation and how to make it yourself.
The sequence of actions in the organization of the courtyard:
- We knock down the wooden frame, fastening the boards with nails or screws and taking care that the sharp tips of the nails do not stick out of the tree, otherwise the bird may be injured. Under the dimensions of our chicken coop, the frame should have a length and width of at least 4 by 6 meters and a height of 1-1.5 meters.
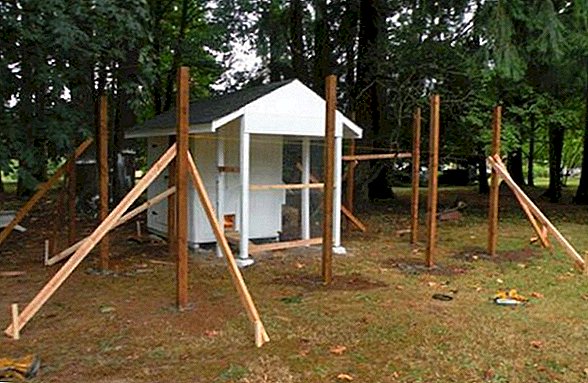
- We make one of the walls of the frame almost “deaf” - it will be located on the north side to protect chickens from the cold wind (if the chicken coop is oriented in such a way that the most dangerous side is covered with natural obstacles - for example, a fence or a hedge from a bush - to this precautions may not be taken).
- The finished frame is covered with a metal grid around the perimeter, which is attached to the boards with nails and wire.
- When assembling, we do not forget to provide for an entrance - preferably a double one, divided by a small vestibule. This will not allow too active birds to flutter at will when the door is opened.
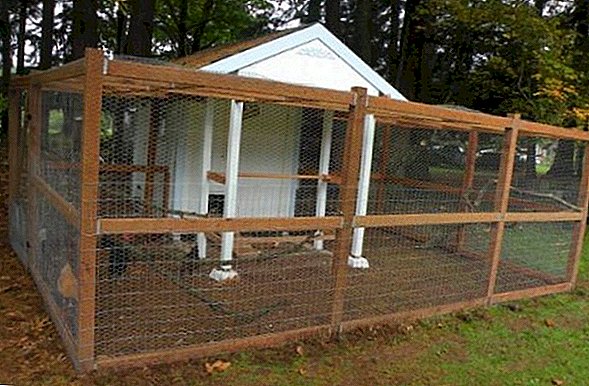
- You can cover the upper part of the frame with a net, but if its height is one and a half meters and higher, there is no need for this - the bird will not overcome this obstacle.


Interior arrangement
Poultry, like humans, need certain utensils and "furniture" in the dwelling. In the case of chickens, these are perches, nests for laying eggs, as well as feeders and drinkers.
Important! Each adult hen needs about 20 cm of “personal space” on the roost. Larger meat breed birds are better off with a minimum of 25 cm. Youngsters less than three and a half months old will be 15 cm long. However, you need to keep in mind that in hot weather birds need more free space than in the winter when they are happy churn in piles to keep warm.
Construction of perches
A roost is a crossbar or pole on which chickens sit at night. 
At arrangement of perches it is necessary to be guided by the following rules:
- As the material should be used wood, the best bars with a section of 4-5 cm.
It will be useful for you to read about how to make roosts for chickens.
- Bars need to be well cleaned with emery paper and, if they have a rectangular cross-section, round off, so that it is more convenient for the birds to cling to the perch with their paws.
- Two opposite walls of the shed, located perpendicular to the farthest from the exit (it is there, in the most secluded place, it is better to make roosts), at a height of 0.6 to 0.9 m above the floor level, side planks of wood are nailed and grooved under future perches (the distance between the crossbeams should be 25-35 cm).
- Pre-prepared poles are inserted into the slots. It is better not to fix them with glue or nails, this will allow you to easily clean and, if necessary, rearrange the hen house.
- On the sides of the poles, small wooden ladders are installed under a gentle slope, along which badly flying birds will be able to climb to the required height.

Nest arrangement
With the arrangement of nests is much easier. As such, you can use wicker baskets or boxes - wooden or plastic. The only requirement is safety: any protruding parts of the nails must be cut off or very carefully rubbed with a needle file so that the layer does not get hurt while settling in the socket.
Read more about nest manufacturing technology.
The size of the nest depends on the breed of chickens, but on average it should come from 30 cm in length and width, and the depth can be a little more, up to 40 cm. 
When setting up nests, use the following tips:
- Boxes, unlike perches, do not need to be fixed to the walls. It is unhygienic and uncomfortable. Nests should be portable.
- Nests are usually installed in the most secluded and protected from drafts corner of the barn, next to the roost.
- For nests you need to build a small platform, about 10 cm high.
- Inside, the nest is lined with hay, straw or sawdust.
- The nest should be provided with free access not only to the bird, but also to the owner - to extract eggs and change litter.
Familiarize yourself with the characteristics of the selection and use of fermentation litter.
- You can install nests in several tiers, one above the other - in this case you need to provide take-off shelves so that the bird can easily climb to the top "floor".
- The number of nests is determined from the calculation: one nest for 4-5 layers.
A more difficult option is a nest with an egg-box. It is made by hand from scrap materials (wood or plywood) and is a box, the bottom of which is located at a slight bias (10 °). The wall of the box, located in front of the bottom of the pallet, should have a hole at the bottom, into which eggs will fall out and a plastic tray attached next to it.
This tray is lined with a thick layer of sawdust so that the eggs do not beat when they fall, and less is placed in the bed itself - then the eggs can freely roll down the slope into the tray.
Feeders and drinkers
Some poultry farmers feed chicken on the hen house floor, but this approach is fundamentally wrong:
- This leads to waste of food, which inevitably has to be swept along with dirt and feces.
- This is unhygienic and increases the risk of morbidity in poultry.

It is known that the main factor in the spread of such a dangerous disease of chickens as coccidiosis is precisely the feces, which contain the oocysts of the pathogen (coccidia). Eating food from the floor or the ground, a bird, therefore, has a much better chance of catching a serious infection.
It will be helpful for you to read about how to make your own drinker and feeder for chickens.
Therefore, the presence of specialized feeders and drinkers is a mandatory sanitary requirement for the arrangement of the chicken coop. Moreover, they need to be arranged in such a way that each individual has free access to food and water and at the same time does not get the opportunity to climb into the appropriate tank with legs.
According to the standards tested in practice, the space required for free food intake per head should be:
- for an adult bird - 10-12 cm;
- for young animals up to 140 days old - 8-10 cm;
- for 2 weeks old chickens - 2-5 cm.

Drinking trough for adult birds and young stock should have a length of the calculation - at least 2 cm for each bird. 1 cm is enough for chickens.
Important! If the birds have a yard for daily walking, feeding troughs and drinking bowls are best placed not inside the shed, but under the open sky, this will ensure maximum cleanliness inside the room and facilitate its cleaning. At night, the bird can do without food and without drinking.
If the main part of the day chickens are still held indoors, the feeder and water bottle will have to be placed in it. Today there are a huge number of various options for chickens and feeders for chickens: polypropylene pipes, automatic bunker-type devices, plywood fixtures, plastics, and even plastic bottles or buckets.
Video: practical tips on making a chicken coop The place and method of its installation depends on the chosen construction: some containers are fixed to the wall, others are hung from the ceiling, and others are installed on the platform. It is only important to remember that the food and water should be at the level of the bird's chest, and not at its feet, so they should not be installed on the floor in any case.
That's all. If the recommendations and instructions are executed correctly, the dwelling for feathered inhabitants is ready and equipped. It remains only to acquire and launch into it happy clucking new settlers!